Showing posts with label Lawn Fawn. Show all posts

Sunday, September 25, 2022

Awesome Autumn Cards LF


Hi, friends! 

Today, I'm sharing a couple of cards to play along the Awesome Autumn Challenge going on over at Lawn Fawnatics Blog.  


I had so much fun with cute stamps & dies  and I also enjoyed the autumn colors. It was such a happy crafting. 


So here's detailed description. 


[ CARD 1 ]


In the photos below, I shared ink and marker colors I used and a few making steps. As this was the first time making a reveal wheel one, I referred to a  tutorial video at Lawn Fawn channel. 


Apples were cut from red cardstock and were added deeper red shades with a memento ink. Leaves were cut from kraft cardstock and were colored with Copic markers shown in the photo. 


Now the card is finished and you can see four scenes that change when you roll the wheel. 


After I assembled the elements, I added gel pen details and sparkling sequins for embellishment. 


Although there were a little errors when making this, I'm so happy with the final result. It was very fun! 


[ Card 2 ]


The second card isn't a pop-up one but I used the same backdrop and color schemes as the first one . I wanted to create a lovely autumn scene based on Leafy Tree Backdrop : Portrait , so I gently inked the frame with Distress Oxide Antique Linen and Tattered Rose. 


Products I used are Giant Happy FallApple-solutely Awesome ,Leafy Tree Backdrop : Portrait die,  and Stitched Woodgrain Backdrop die. In the photos below, you can see colors I used as well. 


I adhered the diecuts using glue or foam tapes where needed for a dimensional look. 
As an embellishment, I added gel pen and sparkling sequins.


The apple picking mice are sooooo adorable that I couldn't stop coloring them :)


[ CARD 3 ] 

My third card is a fun Peekaboo style and is the best one I had picked among today's cards. I love it and I loved all the making process. 


Products I used are Peekaboo Pop-UpApple-solutely Awesome set, Spiffy Speckles Petite Paper, and Knit Picky Fall 6×6 paper. I die cut the pattern paper for backdrops and added more shades using the Distress Oxide inks below. 


For a peekaboo mechanism, I used transparent acetate film as a peekaboo strip. 
The photo below is when you fold the score lines and a mouse is hidden behind the green hill. 


But , when you pull out both sides at opposite direction, you can see a mouse is flying up to the tree to pick apples. How cut is that ! 


I'll post a short REEL to show how this fun mechanism works shortly after, so if you're interested in it, please visit my IG account at @marge.crafts. 

That's it for me today. Thank you stopping by. 
I hope you enjoyed my cards.  Have a great day! 

MARGE


Friday, September 16, 2022

Rainbow themed Winter Cards LF


Hi, all!

Welcome back to my blog today. I have a couple of cards made with some Lawn Fawn products . I love the big frame dies from the fall/winter release and I incorporated a rainbow theme to them to be eligible for the current Lawn Fawnatics Challenge where the theme is Color Inspiration.


To begin with, I roughly watercolored paper in rainbow gradation using Mijello Mission Watercolor paints. It doesn't have to be fine because most of the part would be masked by diecuts or frames. 


[ Card 1 ] 

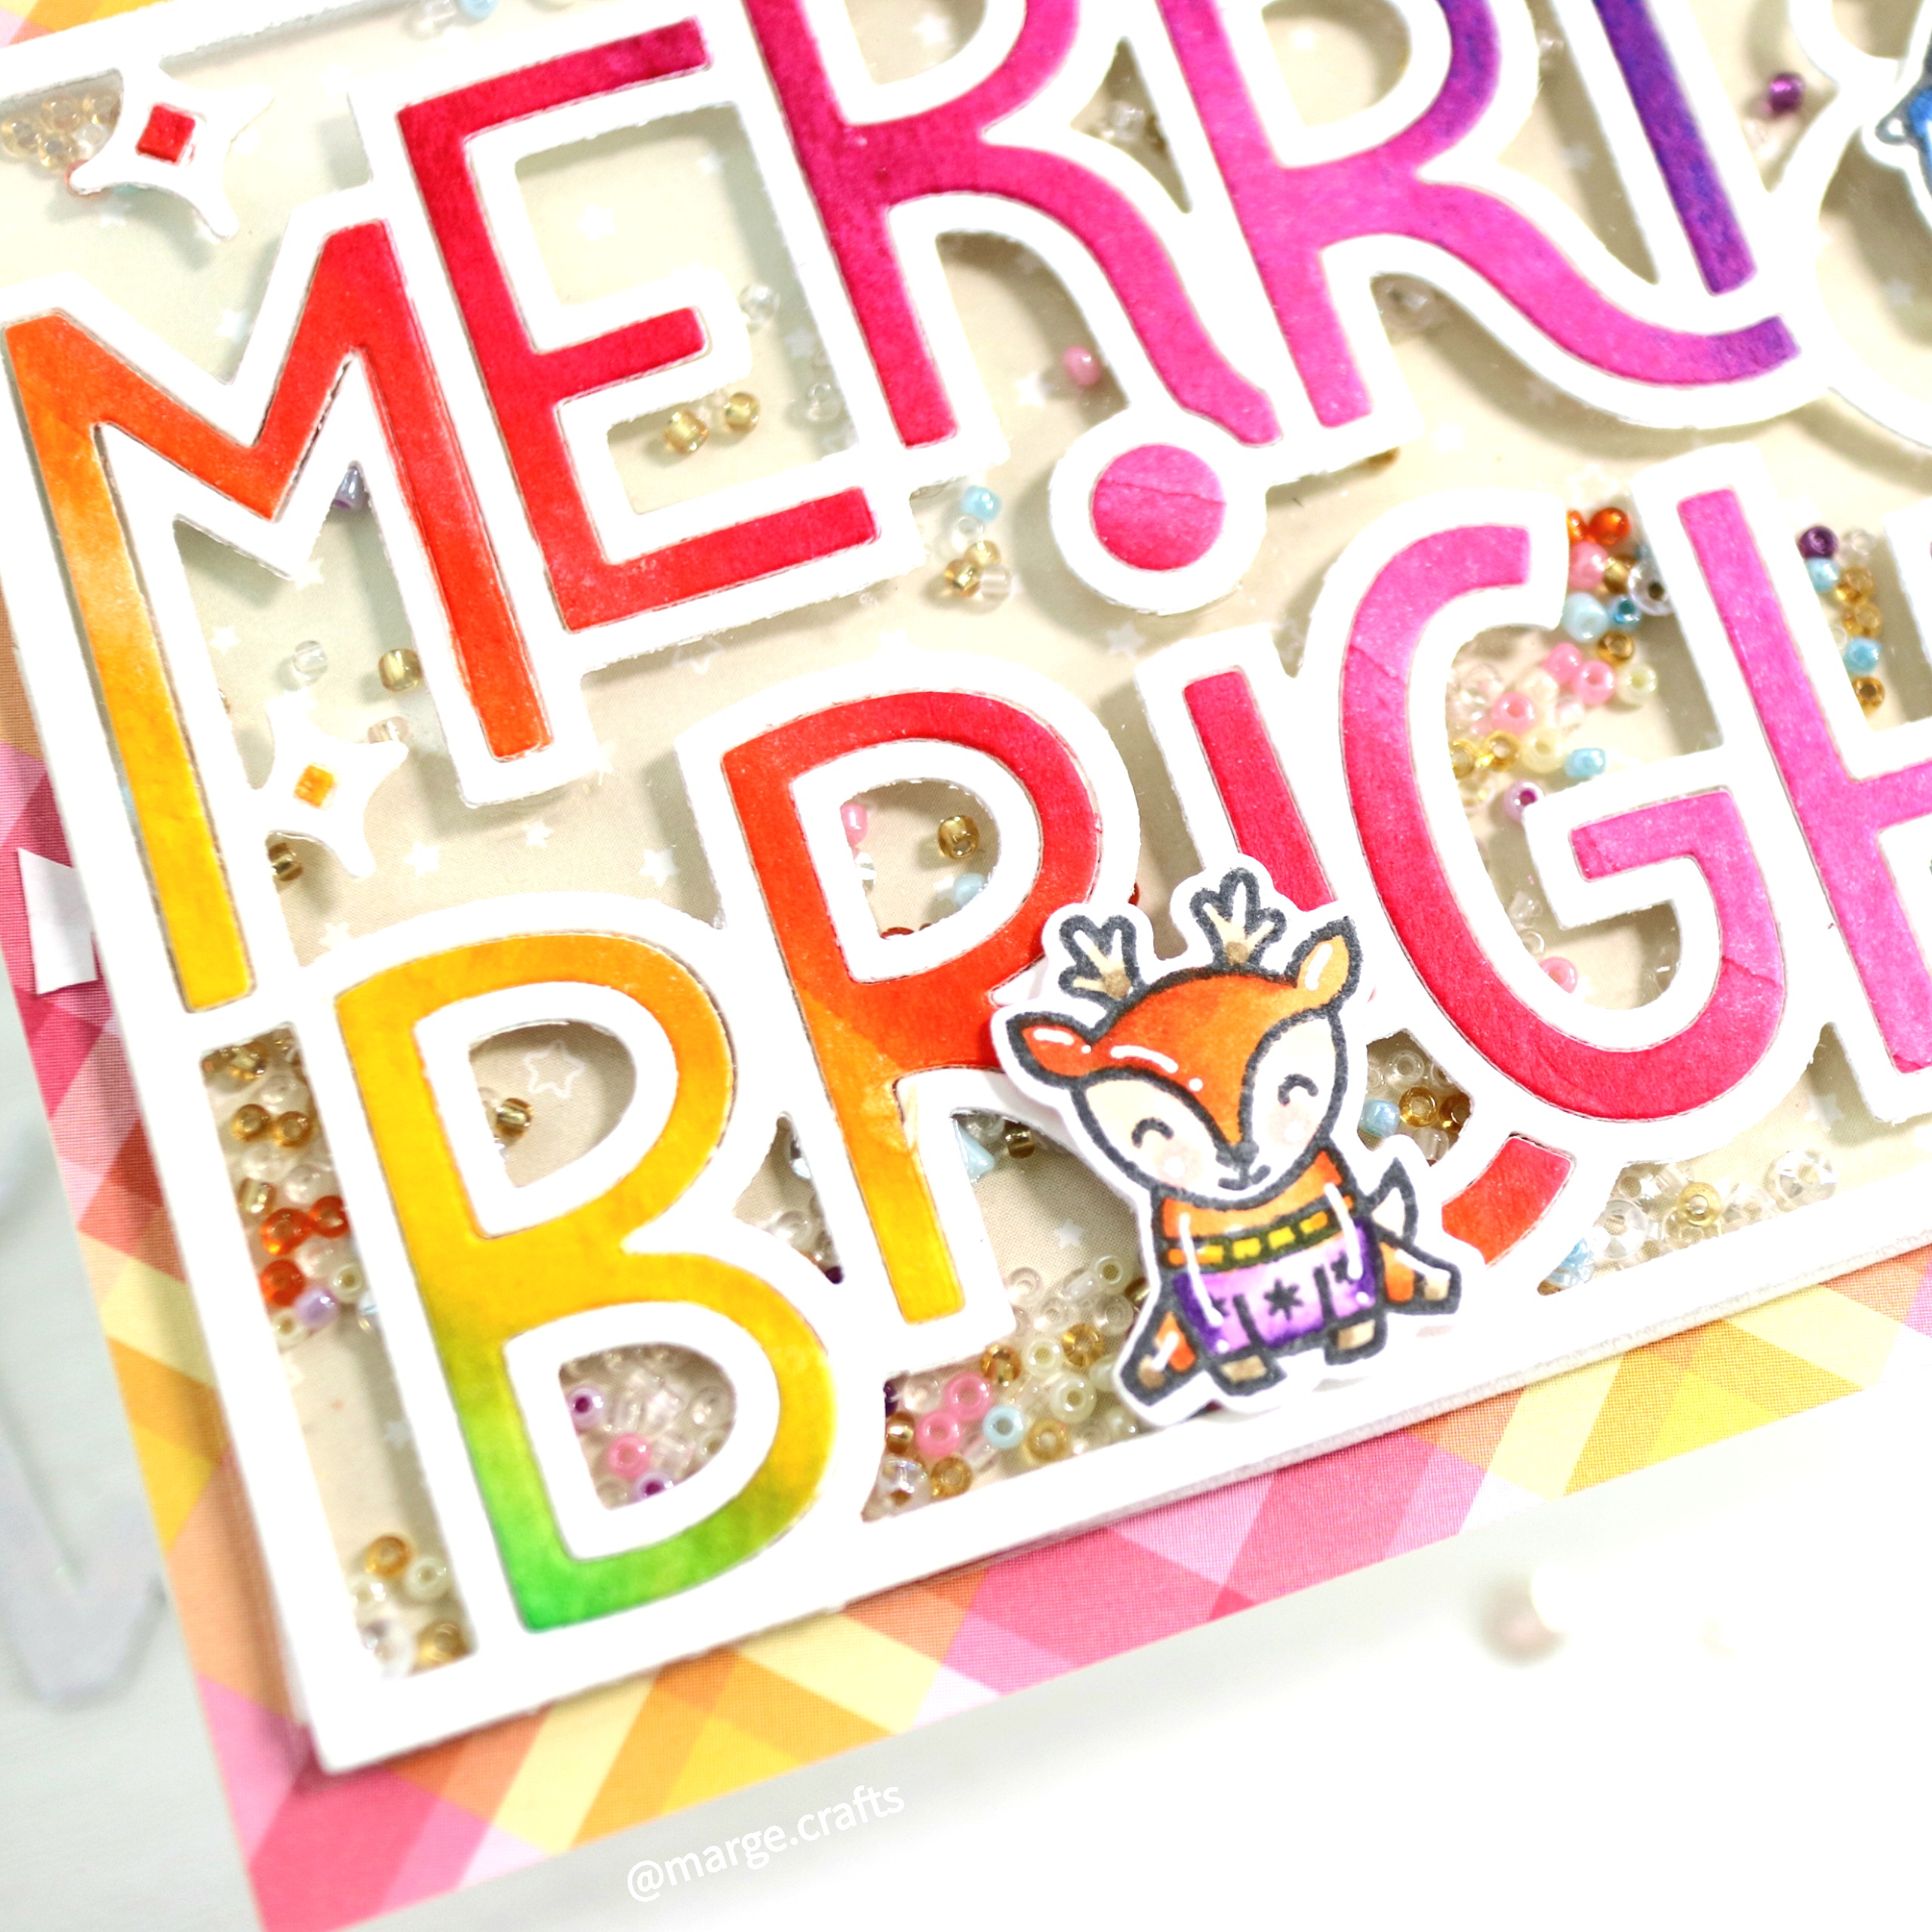
MERRY & Bright Shaker card 


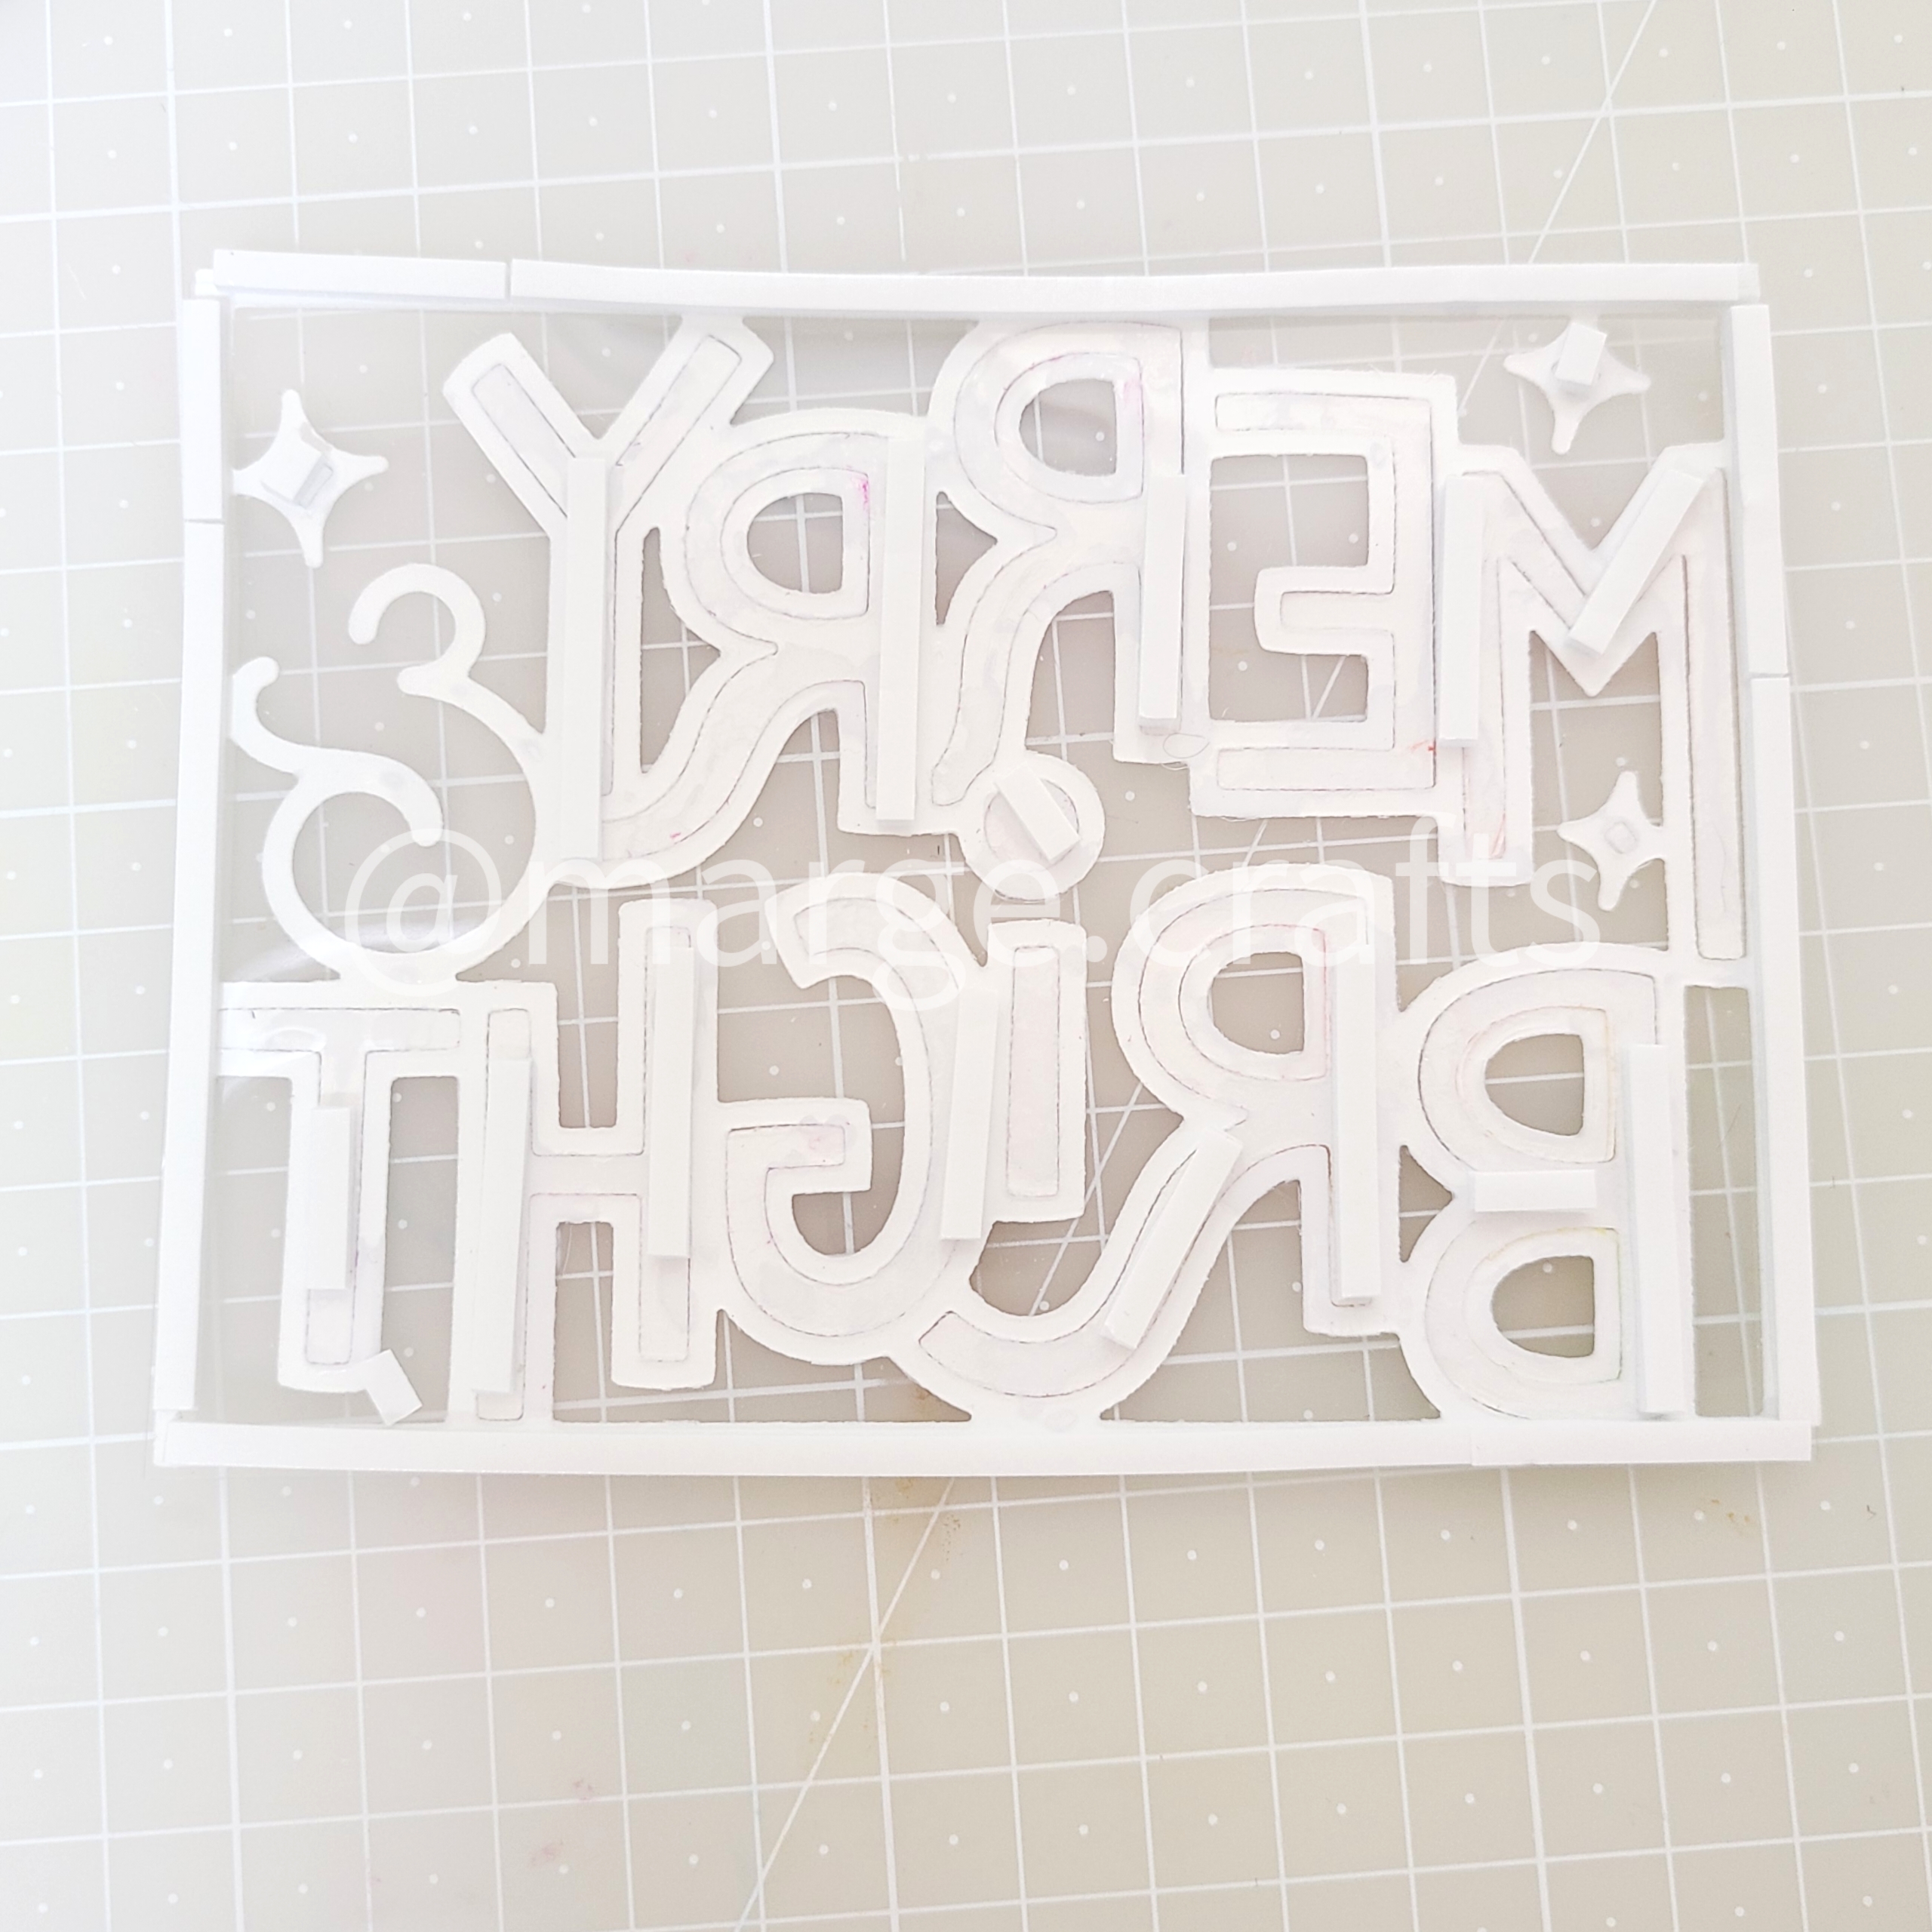
 I die cut Giant Outline Merry & Bright out of the watercolored panel and white card stock. To make front panel of a shaker, I adhered the white frame on a piece of acetate film first, then I in-layed letters that were cut from the rainbow panel. I put the top frame upside down and adhered foam tapes along the edges and backside of the letters.  


I  removed cover film of foam tapes first, then I put sequins and seed beads of various colors and covered the well with backdrop sheet from Let It Shine Starry Skies paper pack. 


If you're new to making shaker cards, be sure to remember that the film of tapes should be removed before putting in shaker contents. 
Now the shaker is finised! 


I trimmed warm tone gingham pattern paper into A2 size in order to mat the shaker. 


To add cuteness to the card, I adhered images from Say What? Holiday Critters set onto the shaker front. 


[ Card 2 ]


After I finished the Card 1, negative and positive diecuts were left from each colored & white panel. So, I assembled them to make another rainbow card front, which looked a little flat. 


 So, I cut another set of Letters from white paper again, applied Glue & Seal on bottom part of each letter, then I put Prisma Glitter to them, and then I glued the letters for a dimensional look. 


I also added small clous diecuts, which I made with Plane and Simple Coordinating dies set, inked edges, applied molding paste and Prisma Glitter. For embellishment, I adhered some clear drops. 


[Card 3]

It's again a shaker card. 


I prepared backdrop, front panel, and letter diecuts as shown in the picture : Stitched Snowflake Backdrop pattern added to the watercolor panel, shaker frame with Snow Flurries Backdrop, and the letters Giant Let It Snow cut out of white, cotton pink and glitter card stock. 


Making process for shaker well was very similar with the Card 1. 


I love the giant letters and frames so much, which have endless designing possibilities. 


That's it for me for today. I hope you enjoyed my cards. 
Thank you and have a great day.

MARGE


Sunday, September 11, 2022

Rainbow Houses Winter Scene Card LF


Hi, friends!

Today I'm sharing a cute winter scene card to join the challenge over at Lawn Fawnatics Blog


The current challenge theme is Color Inspiration and it is rainbow. 


Here's step by step descriptio of what I did for today's card. 
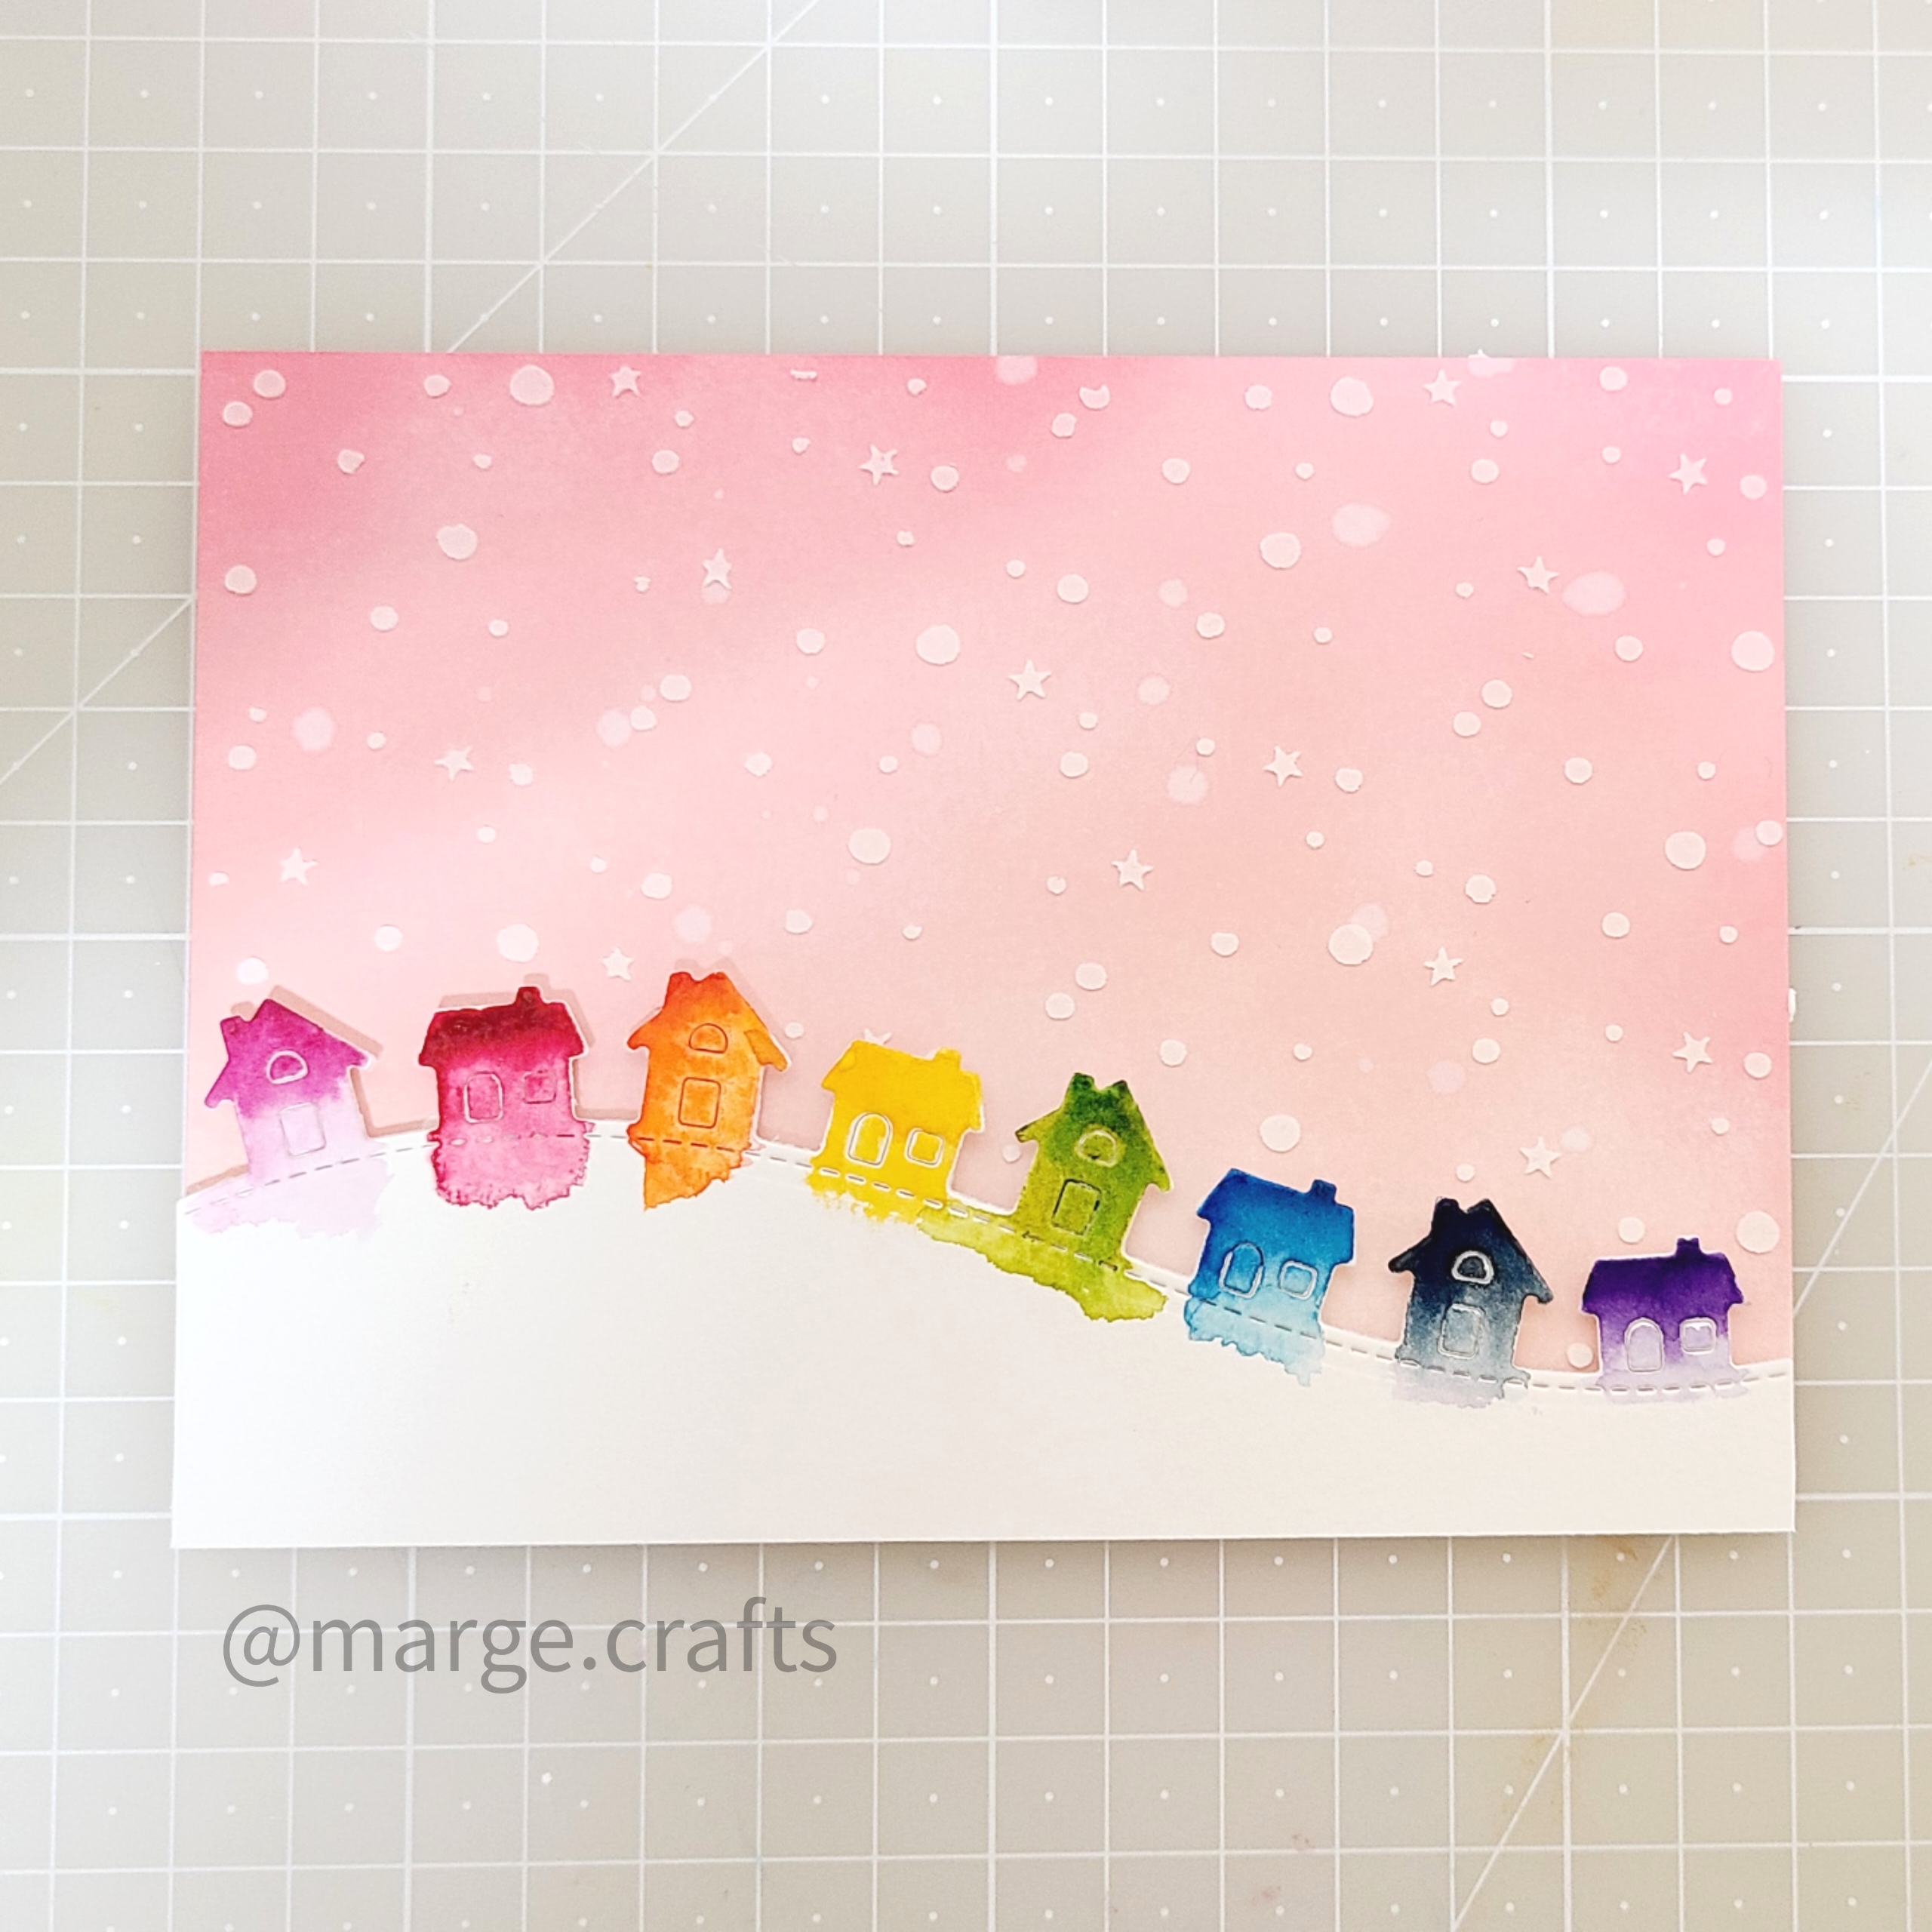
First I die cut  Little Town Hillside Pop-up Add-on out of watercolor cardstock, and I watercolored each house in rainbow colors. 


As you can see in the picture above, I did partial diecutting so that the little pieces were held in the frame and it made coloring easier. 
Next, I trimmed a piece of white cardstock into A2 size, then I ink blended it using 3 different Distress Oxice inks : Worn Lipstick, Tattered Rose, and Spun Sugar. I added splatters of water and dabbed with tissue to remove excess water. 


Next, I placed Snow Flurries Background Stencil onto the panel, then I applied modelling paste through the stencil. I used Schimincke's product which I had bought a local art supplies store.


After the paste was dry, I foam mounted houses diecut on the panel. 


Next, I adhered  Snow Flurries Backdrop frame which was cut from watercolor paper, which finished soft & rainbow colored winter scene. 


For the sentiment on the top, I stamped Winter Wavy Sayings on Fancy Wavy Banners Diecut using Versafine Onyx Black InkI adhered cute critters from  Say What Holiday Critters set around the banner and on the bottome of the card. 


As a finishing touch, I added some clear drops around the scene. 


That's it for today. Thank you so much for stopping by!
Have a great start of a new week.

MARGE


Monday, September 5, 2022

Winter critters card


Hi, crafty friends!

Today, I'm sharing a cute critters card made using some old and new products from Lawn Fawn. It's been ages since I last colored cute critters, so I needed some courage to do it again. 


For background, I trimmed a piece of blush cardstock into A2 size, then I made snowflake stitches pattern using Stitched Snowflake Backdrop Die. I added pink & violet shades to the panel by sponging the panel with my dye inks. Next, I adhered snowflake frame that were cut out of white cardstock using Snow Flurries Backdrop Die, giving a little dimension with thin foam tape. I added splatters of white ink and metallic gold ink all over the panel and let them dry. 


For the critters, I stamped images from Ugly and Bright and Say What Holiday Critters set on copic friendly paper with Memento Black ink, then I colored in them using copic markers. Next, I cut them all using coordinating dies. 


I adhered the critters and sentiment which was heat embossed in white, on the panel using adhesive foam squares. As a finishing touch, I adhered some pink colored jewels. 


Coloring little cute critters drew out my inner child, and it was so much fun. I think I'll do this more in my future projects. 
Thank you for stopping by.

Have a great day!

Marge


Friday, September 2, 2022

Distress ink blended background winter cards LF

 Hi, friends!

I've got two winter cards with the same colored backgrounds by using distress inks. 

I used some old and new products from Lawn Fawn for today's cards.


Here's the first card made of only diecuts with minimal coloring. 


For the background panel, I trimmed a piece of white cardstock into A2 size, then I ink blended it using regular distress inks : salvaged patina, weathered wood, and specked egg. I splattered with water, removed excess water by tapping it with tissue. 


Next, I placed Snow Flurries Background Stencil onto the panel, then I applied modelling paste through the stencil. I used Schimincke's product which I had bought a local art supplies store. 


I love how the tiny snowflakes and stars look very cute when they were given dimension by molding paste. 


I set this panel aside and let them dry. 


Next step, I die cut Snow Flurries Backdrop from white cardstock.  I made two cuts and glued them together. 


I also cut "Let it Snow" from white cardstock and diamond glitter cardstock, then I layered them with dimensional look. 
The small bird and a pair of gloves were cut with Build-A-Snowman and colored with Copic markers (RV99, R89, R59, R39). I added white gel pen accents to them.


Once all the elements were finished, I glued Snow Flurries Backdrop frame to the background panel, and then I adhered "Let it Snow" diecuts using foam squares, and finally I adhered bird and gloves. 


As a finishing touch, I added clear drops. 


My second card used the same colored background. However, probably due to the differences in white paper (this time I used Strathmore Bristol paper), which I don't exactly understand the reason, I had to add more inks to make similar colors. 


So, I used salvaged patina, weathered wood, and specked egg, peacock feathers, and evergreen bough. Stencil was done with the same way. 
Next, I cut Deck The Car out of some color cardstocks, then I added more shades by lightly sponging the edges of diecuts. After coloring was done, I assembled them using a fine tip glue


To make a road for the car, I used Little Town Hillside Pop-up Add-on diecut which was slightly inked with Evergreen Bough distress ink, and were glued to the panel. 


For the sentiment on the top, I stamped Winter Wavy Sayings on Fancy Wavy Banners Diecut using Versafine Onyx Black Ink. After assembling all the pices to make a fun winter night scene, I added some clear drops and finished off my card. 


These two cards were done with easy and simple way, but I really enjoyed it. It's always so exciting to add colors and shades and textures one by one onto white paper and finally you get a fun, colorful scene !

A new REEL of making process will be soon shared on my Instagram account. 
Thank you for stopping by. 
Have a great day!

Marge