Sunday, April 28, 2019

Watercolor Spring Floral Scene with Butterflies card from Pretty Pink Posh


Hi, everyone!
I'm going to share a watercolor spring card which features Spring Wreath Stamp Set and Beautiful Butterflies Stamp Set from Pretty Pink Posh

butterfly 1.jpg 

To begin, I trimmed heavyweight watercolor cardstock into A2 size, then I placed negative diecut of larger Scallop Ovals Die on the center to mask it off. The outer space was filled with small images from Spring Wreath Stamp Set using Versafine Onyx Black Ink.


I watercolored all the images using watercolor brush markers from Altenew and I added gold and blue dots on empty space between images using pearl pens which I had bought at a local store. 

butterfly 3.jpg 

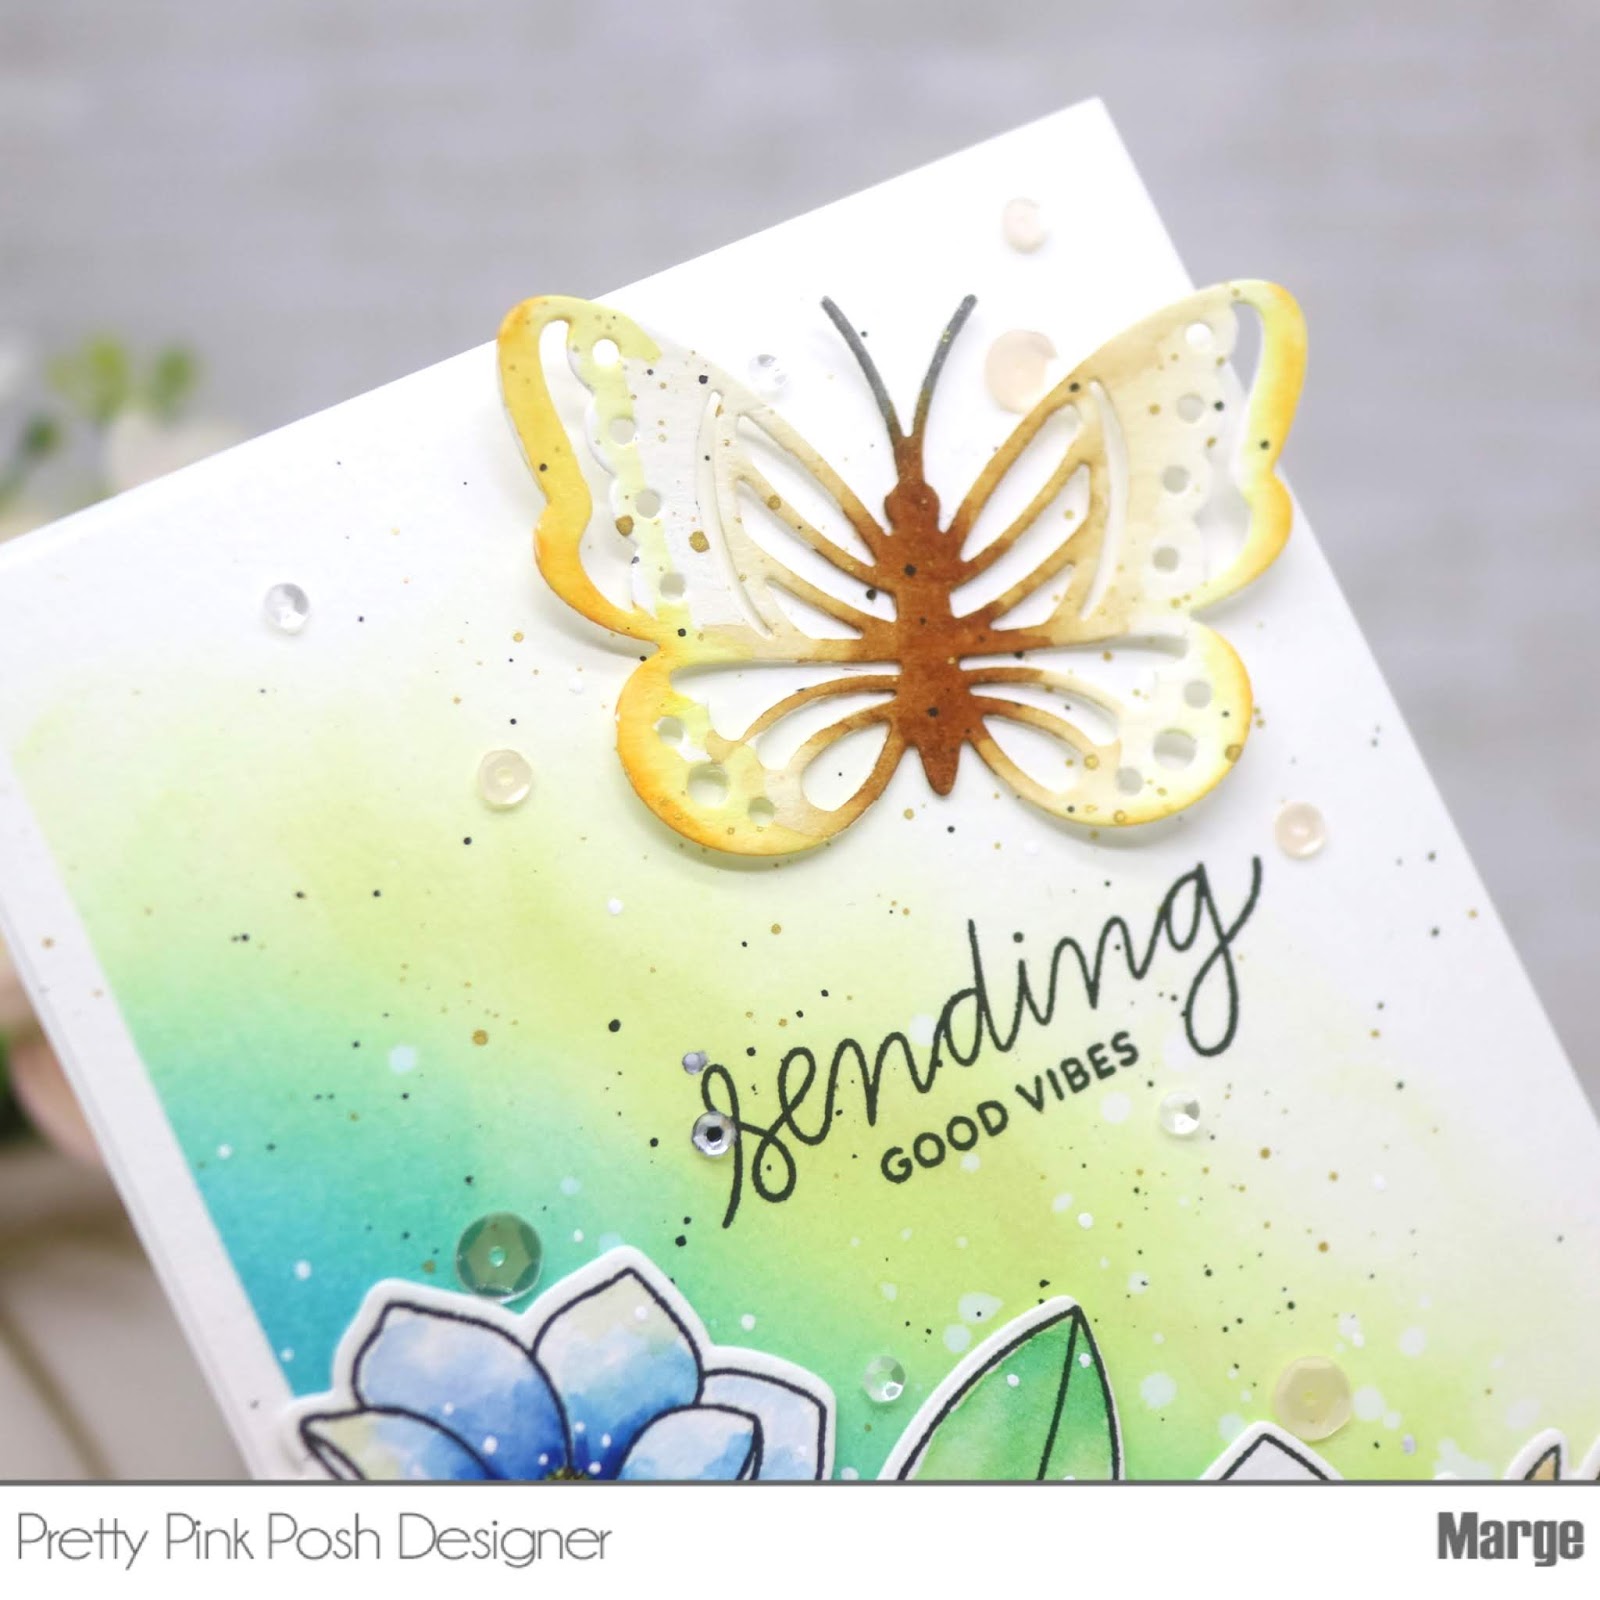
Next, I added butterflies from Beautiful Butterflies Stamp Set and Butterfly Friends Stamp Set to the scene. 
The sentiment was chosen from Thoughtful Greetings set and was stamped on the center using my mini-MISTI. In turn, I adhered butterflies using Square Foam Adhesives to make them look dimensional. 

butterfly 4.jpg 

Finally, I foam mounted my panel onto A2-sized card base and then I  added Sparkling Clear Sequins4mm Ballerina Pink and 6mm Ballerina Pink Sequins around the scene using micro Glue Dots
I love this cheerful spring mood from all the bright colors I used in my card and I enjoyed coloring those florals and butterflies a lot, which was very relaxing and stress-relieving. 


butterfly 6.jpg 

Thanks for stopping by!
Hope you will enjoy this.


Saturday, April 13, 2019

SSS Blossoms and Butterflies Release Inspiration


Hi, friends!
Have you seen the new Blossoms and Butterflies Release from Simon Says Stamp? It's full of awesome products as always! 
Today, I'm going to share three cards to share with you featuring some of the new release items. 


For my first card, I made a stenciled background by ink-blending of Distress Oxide inks Peacock Feathers, Mermaid Lagoons and Twisted Citron through Stencil Mesh, then I stamped sentiments from Comfort and Prayers Stamp set on the left upper corner of the panel. 


I created a floral scene by combining colored images from Mandy's Flowers and Comfort and Prayers Stamp set, which were colored with Copic Markers. 
After I adhered my images on the panel using foam adhesives, I added Clear Droplets to embellish the card. 


I love how the flowers and butterflies look well with the stenciled background and I really love the sentiment which would calm someone's mind when they are sad or frustrated. It surely did the same to me myself. Here are some other photos from different angles.


FYI, major Copic marker numbers I used are R46-43-R32-R30, RV29-RV25-RV23-RV21, V17-V15-V12-V000, Y38-Y35, B06-B04-B02-B00, etc. The gray tin pail was colored with Tonic Nuvo alcohol markers 491-489-487-485. 


For my second card, I used Distress Oxide inks Picked Raspberry and Squeezed Lemonade, and I simply adhered two layers of Dahlia Corner Frame Die cut made of a gold mirror cardstock on the left lower corner of my panel. 


The sentiment was chosen from Moments of Grace Stamp set. Then I added butterflies from Comfort and Prayers Stamp and Plantiful Puns Stamp set around the frame. 


I used the same embellishment as the first one: 4mm Clear Droplets and 6mm Clear Droplets


Here's my third card for today, which features Lotus Frame Die from the new release. 


The bottom layer was made of Stitched Whirl Background Die and Ivory card stock, the middle layer was cut with Wrapped Scalloped Rectangle Die, and then I adhered three layers of Lotus Frame Diecuts which had been glued together using Multimedium matte


Thanks for reading, today. I hope you enjoyed my cards and I hope you will enjoy the new release.
Have fun!


Marge

Magnolia with Butterfly card from Pretty Pink Posh + Sale info


Hi, friends!
Today's card features Magnolia Flowers Stamp and Bold Butterflies Dies from Pretty Pink Posh. 


To begin, I masked off the left and lower borders of watercolor paper using washi tape then I ink-blended it using Distress Oxide Peacock Feathers and Twisted Citron. I splattered with black and gold inks and water on to the panel and let them dry. 


Magnolia Flowers were watercolored using my Daniel Smith paints and cut using Magnolia Flowers Coordinating Dies. I also diecut Bold Butterfly out of watercolor paper and colored the piece using Zigclean brush markers Mustard and Bright Yellow. 


 In turn, I stamped a message from Encouraging Greetings set on my mini-MISTI, then I adhered Magnolia Flowers and Bold Butterfly as shown in the picture. I embellished my card with Sparkling Clear Sequins Mix, 3mm Sparkling Clear Sequins, 4mm Champagne and 6mm Champagne.


That's it from me for today. Thank you for reading. I hope you enjoyed it. 


Pretty Pink Posh is having a three-day sale for all Butterfly Stamps and Dies while supplies last. The sale ends on April 14, 2019. Don't miss this great opportunity to get beautiful items at low prices. 


Friday, April 12, 2019

[Pretty Pink Posh] Crocus Flowers Card

Hi, friends!
I hope you are having a wonderful day.
Last weekend, I had fun coloring beautiful Crocus Flowers from Pretty Pink Posh January Release. So I'm sharing a card with you, today. 


To begin, I stamped Crocus Flowers on Heavy Weight Watercolor paper using Distress ink Antique Linen, then I watercolored them. I used various watercolor media including Rose of Ultramarine and Gamboge from Daniel Smith, and Watetcolor Brush Markers. I added more shades using my polychromo pencils. After I finished colorimg, I cut them all using Crocus Flowers Coordinating Dies.


I trimmed a piece of Bristol paper into A2 size, and ink blended it using Distress Oxide inks (Twisted Citron, Mowed Lawn, Tumbled Glass, and Mermaid Lagoon) . 


Next, I stamped Courage sentiment on top of the panel, and then I adhered Crocus Flowers using Glue Dots and Foam Adhesives.  After I foam mounted my panel to a card base, I added double stranded twine ribbon , Sparkling Clear Sequins Mix, 6mm Lime Sorbet and 4mm Lime Sorbet sequins.


Thank you for reading this post.
I hope you enjoyed it. 
Have a wonderful day!

Marge


Thursday, April 11, 2019

Colored Butterflies Card from New Blossoms and Butterflies Release by Simon Says Stamp


Hi, everyone! 
I'm so thrilled to share a new card simultaneously with the New Release from Simon Says Stamp. Today's card features a new cling background stamp called Outline Butterflies from the Blossoms and Butterflies Collection.


Making this card was super simple except for coloring which took me about an hour. I just stamped the entire images on 80lb Neenah White paper with Black Memento Ink, using my Stamping Platform and then I colored them using Copic Markers. 
Next, I cut the panel using Wrapped Scalloped Rectangles Dies and foam mounted it onto an Ivory Card base.


Thankful 1 diecut and a small sentiment from Mandy's Flowers were also foam mounted on my colored panel as shown in pictures. I embellished my card with Sparkling Clear Sequins Mix and I also added some sparkling details on original black dots using my a metallic pen. 


I love how those butterflies look vibrant and give us happy feelings. This Outline Butterflies Stamp is definitely my favorite one among the new release items.


FYI, the main Copic Markers I used are as follows:

Green: G29-G24-G21-G20
Blue: B06-B04-B02-B00-B000
Purple: V17-V15-V12-V000
Yellow: Y38-Y35-Y15 or Y11
Pink: R35-R32-R11 
Background: YR000, YR0000
Thankful script diecut: E79-E47-E44-E43


Thank you for visiting. I hope you'll enjoy the brand new Blossoms and Butterflies Collection from Simon Says Stamp with us.

Marge 


Please visit Blossoms and Butterflies Collection Gallery for more inspiration and share your creations there, too :)


Tuesday, April 9, 2019

Spring Wreath card from Pretty Pink Posh


Hi, friends! 
Spring comes here with beautiful flowers all around. Hope you are enjoying, too.
Today, I'm sharing a floral card which features Spring Wreath Stamp and Dies from Pretty Pink Posh.


As it is a spring card, I wanted to go with bright colors. I stamped Spring Wreath Stamp on watercolor paper, then I used various watercolor brush markers to color the images. I then diecut them all using Spring Wreath Coordinating Dies


Next, I stamped a small sentiment in the center of another watercolor paper using my mini-Misti with the guidance of colored wreath, then I foam mounted the wreath using Square Foam Adhesives


I love this clean and natural look that comes from twines and white background. 
Hope you'll like it, too!


Thanks for reading. Hugs
Marge


Wednesday, April 3, 2019

Peonies Background Cards


Hi, everyone!
Today, I'm going to share how to make a pair of cards from one watercolored panel with you. 


I started by stamping a beautiful Pretty Peonies Background Stamp from Simon Says Stamp onto watercolor paper using my stamping platform, then I watercolored the images. 


I diecut the panel using Scalloped Mat Die, then I stamped sentiments from Wreath Greetings Set, on the center of a card base through the oval window. The panel was foam mounted on and I embellished the card with Moonstone sequins.


Since I got an oval-shaped piece from diecutting the watercolored panel, I started to make another card with a similar design. 


So here it is. 

I diecut another panel using Scalloped Mat Die out of white card stock, then I foam mounted it onto Fog Gray card base. I then adhered the previously watercolored oval-shaped diecut in the center. Sentiment was chosen from Messages for Everyday set and was heat embossed in white on Schoolhouse Red Cardstock using Fine Detail White Embossing Powder.


Now, two cards are completed using one watercolored panel. I hope you like the way I made them. 
Thanks for reading and have a great day!