Saturday, October 22, 2022

Pretty Pink Posh October Release Instagram Hop Day 3

 Hi, friends!

Today, I'm sharing my cards for PPP October Release IG Hop. As it is an Instagram Hop, all the Hop details are shared at my IG account but here're other details about my cards itself. 


My cards today mainly feature Pine Trees die set.  
I made a slim line card for the first time and it was so fun! 
I chose the smallest tree among the Pine Trees set and die cut it out of various colors of cardstock.


 I then added a little bit of shads to the edges with similar colors of inks. Next, I applied aqua molding paste using Snowfall Stencil  to give fun textures to the trees. 


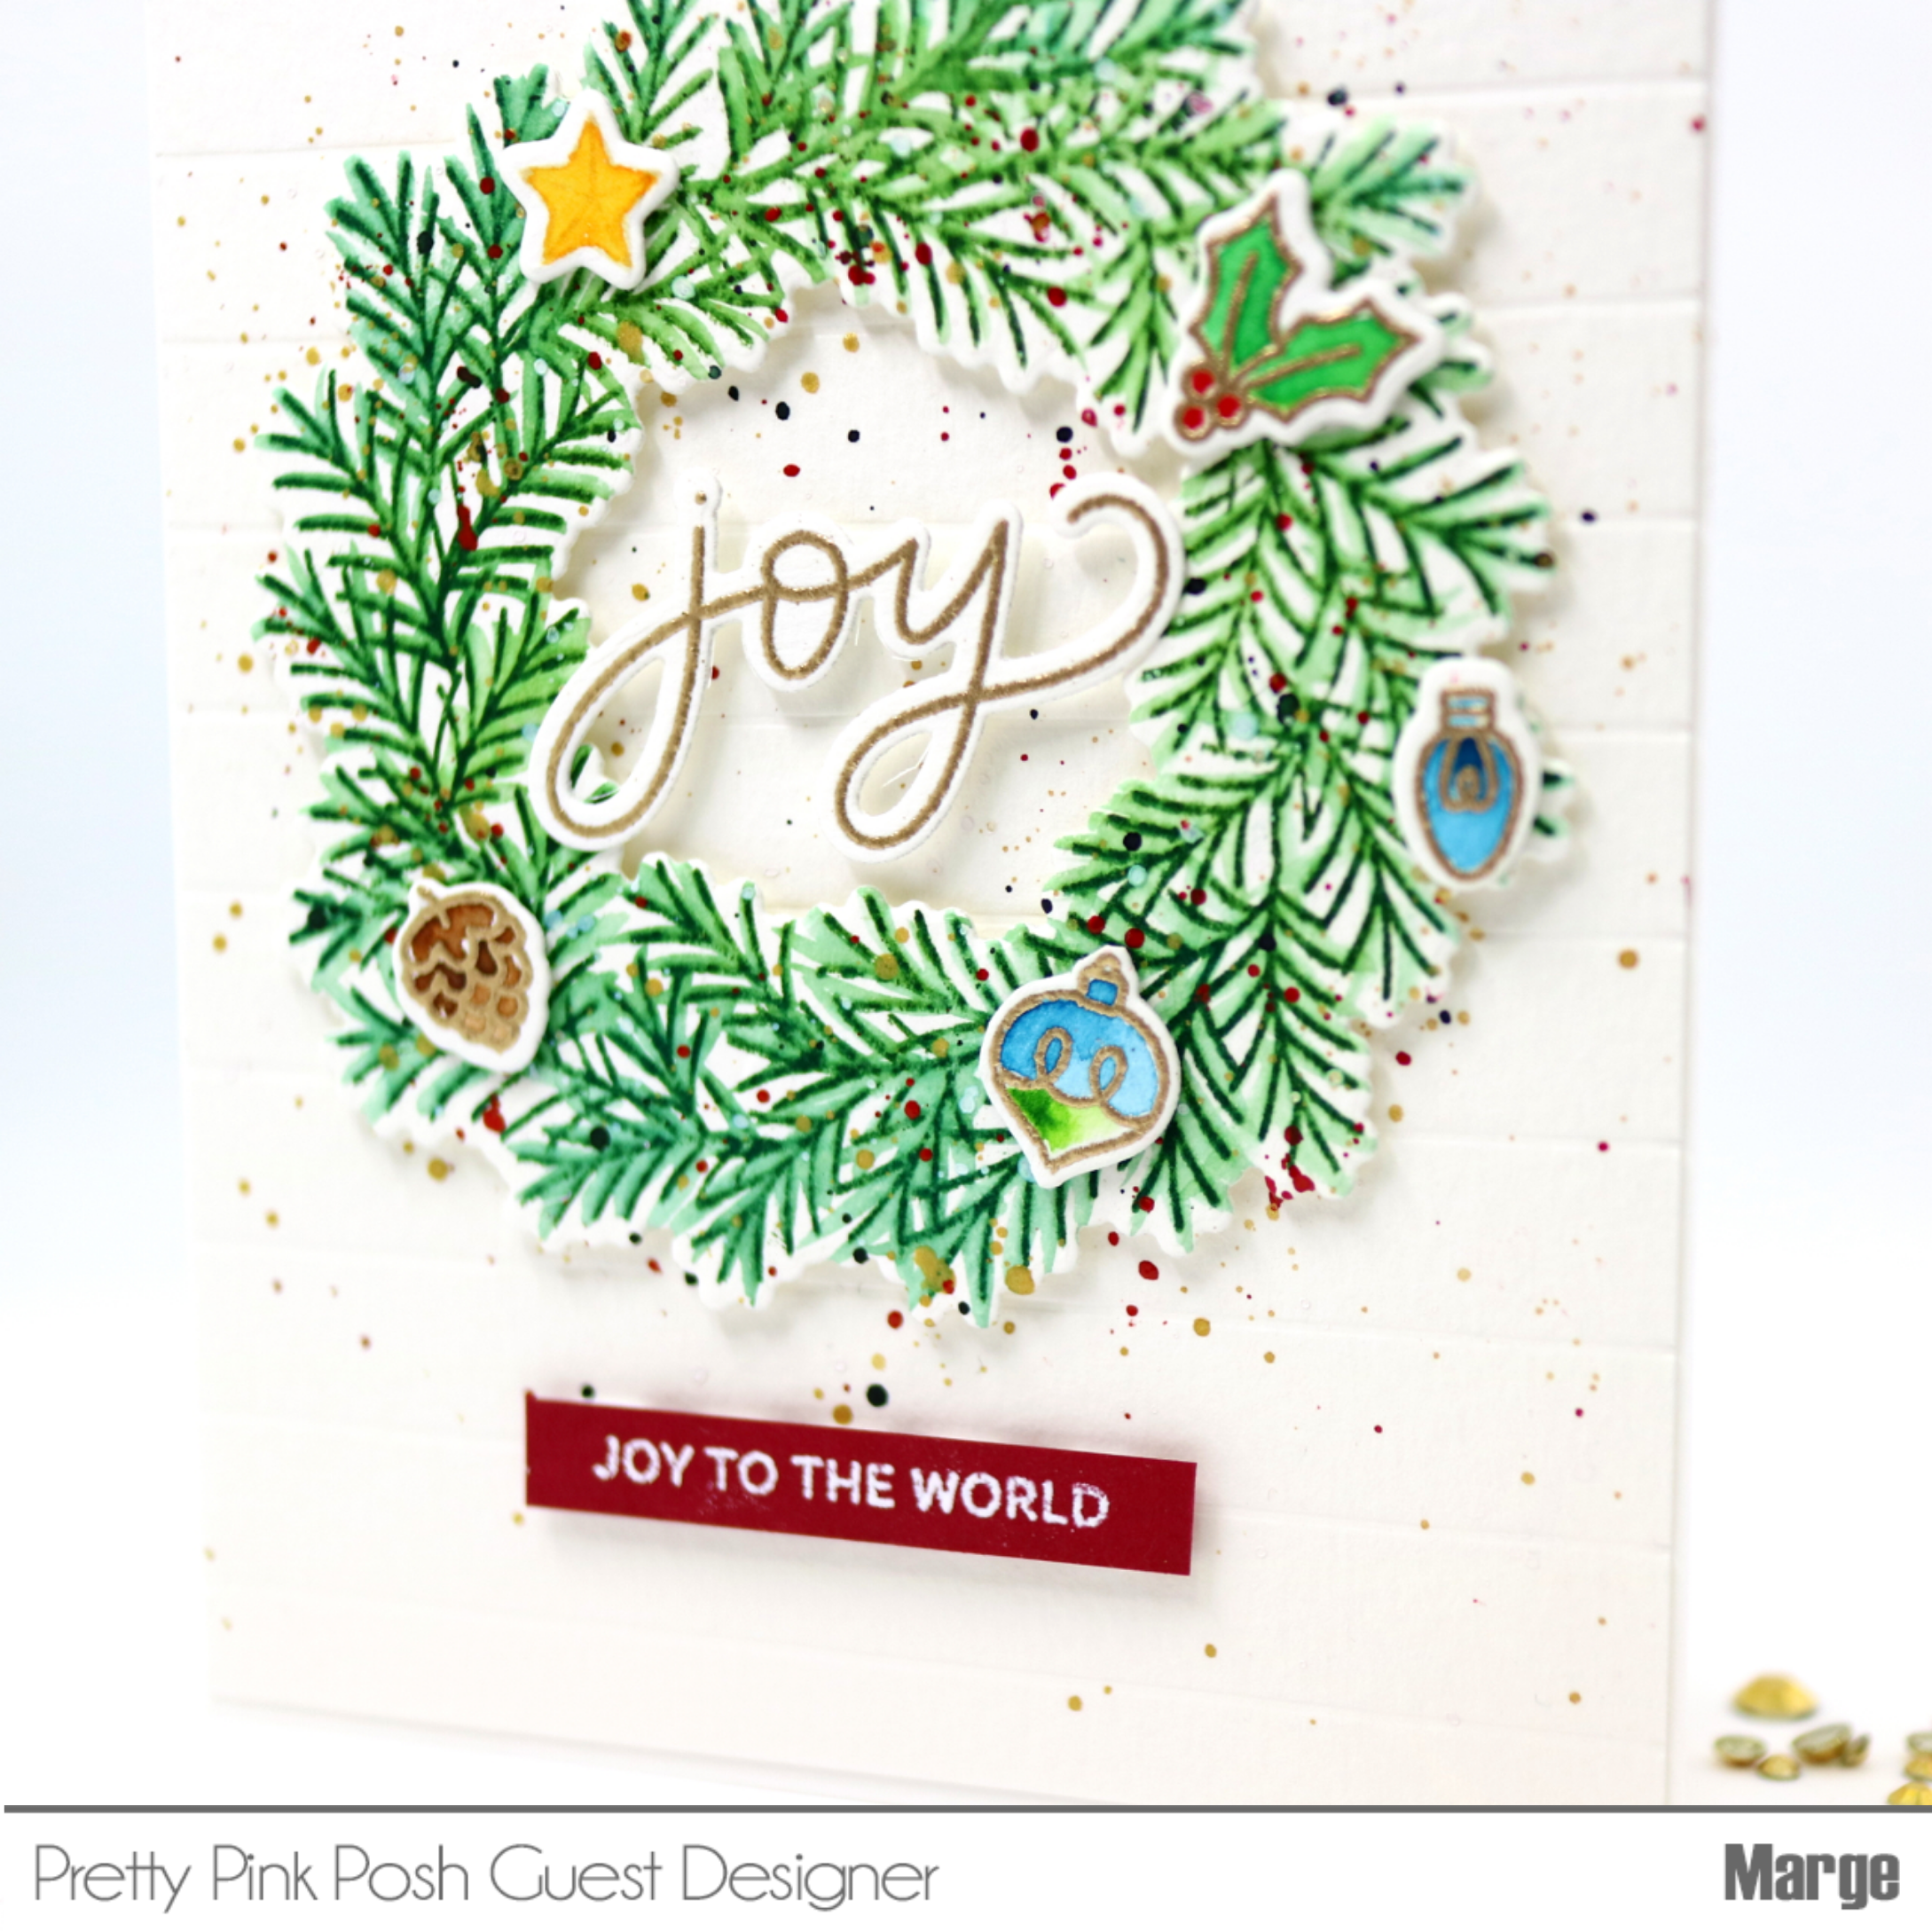
After I adhered the rainbow trees to the base panel, I put Christmas Greetings diecuts on top. For more dimensional look, I made  three layers out of white cardstock and one layer out of glitter cardstock and adhered them using glue. As a final embellishment, I added 3mm Sparkling Clear Sequins all over the card. 


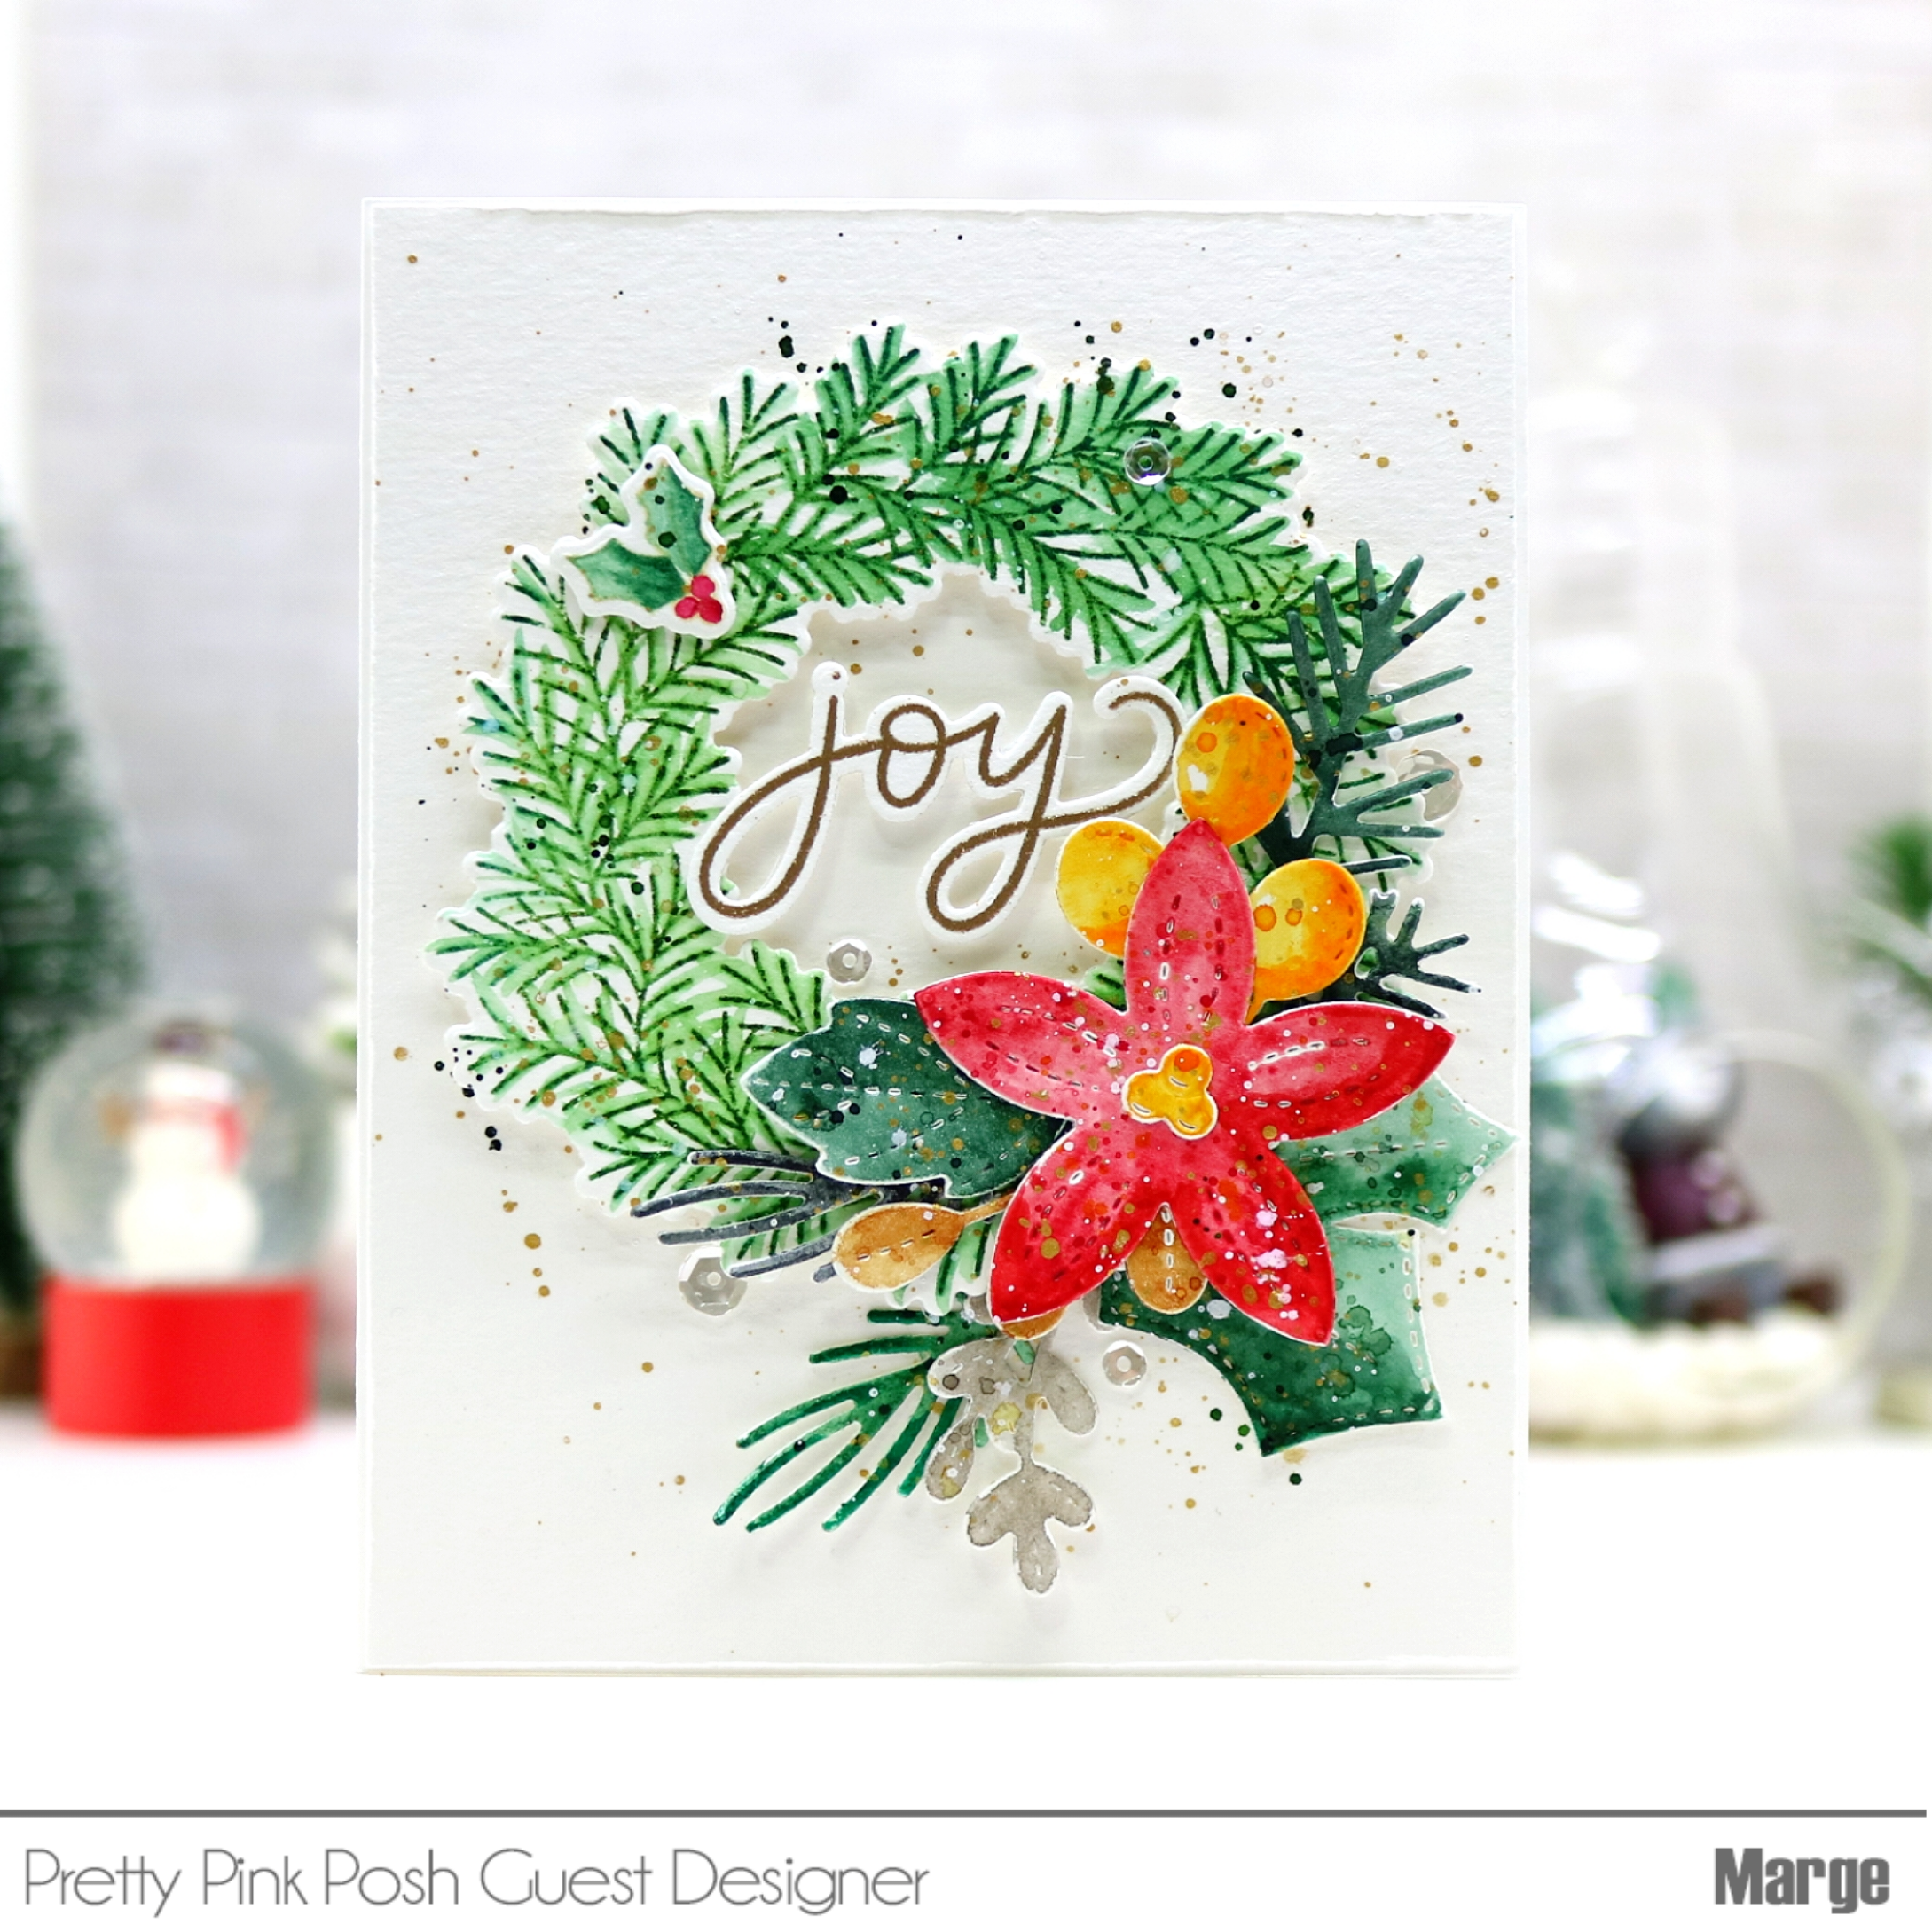
For my second card, I die cut the largest tree out of teal cardstock and ink blended it with a darker ink, then I splattered with white and gold inks. The red dots were made just by punching out of scrap paper using a EK tools punch. 


For the background, I did Snowfall Stencil  with molding paste on watercolor paper and framed the panel with a  Scallop Frame . I foam mounted the tree on the panel, and added a sentiment from Holiday Sentiment Stamp set


I love how the red dots look like festive bulbs/ornaments on the Christmas tree. 


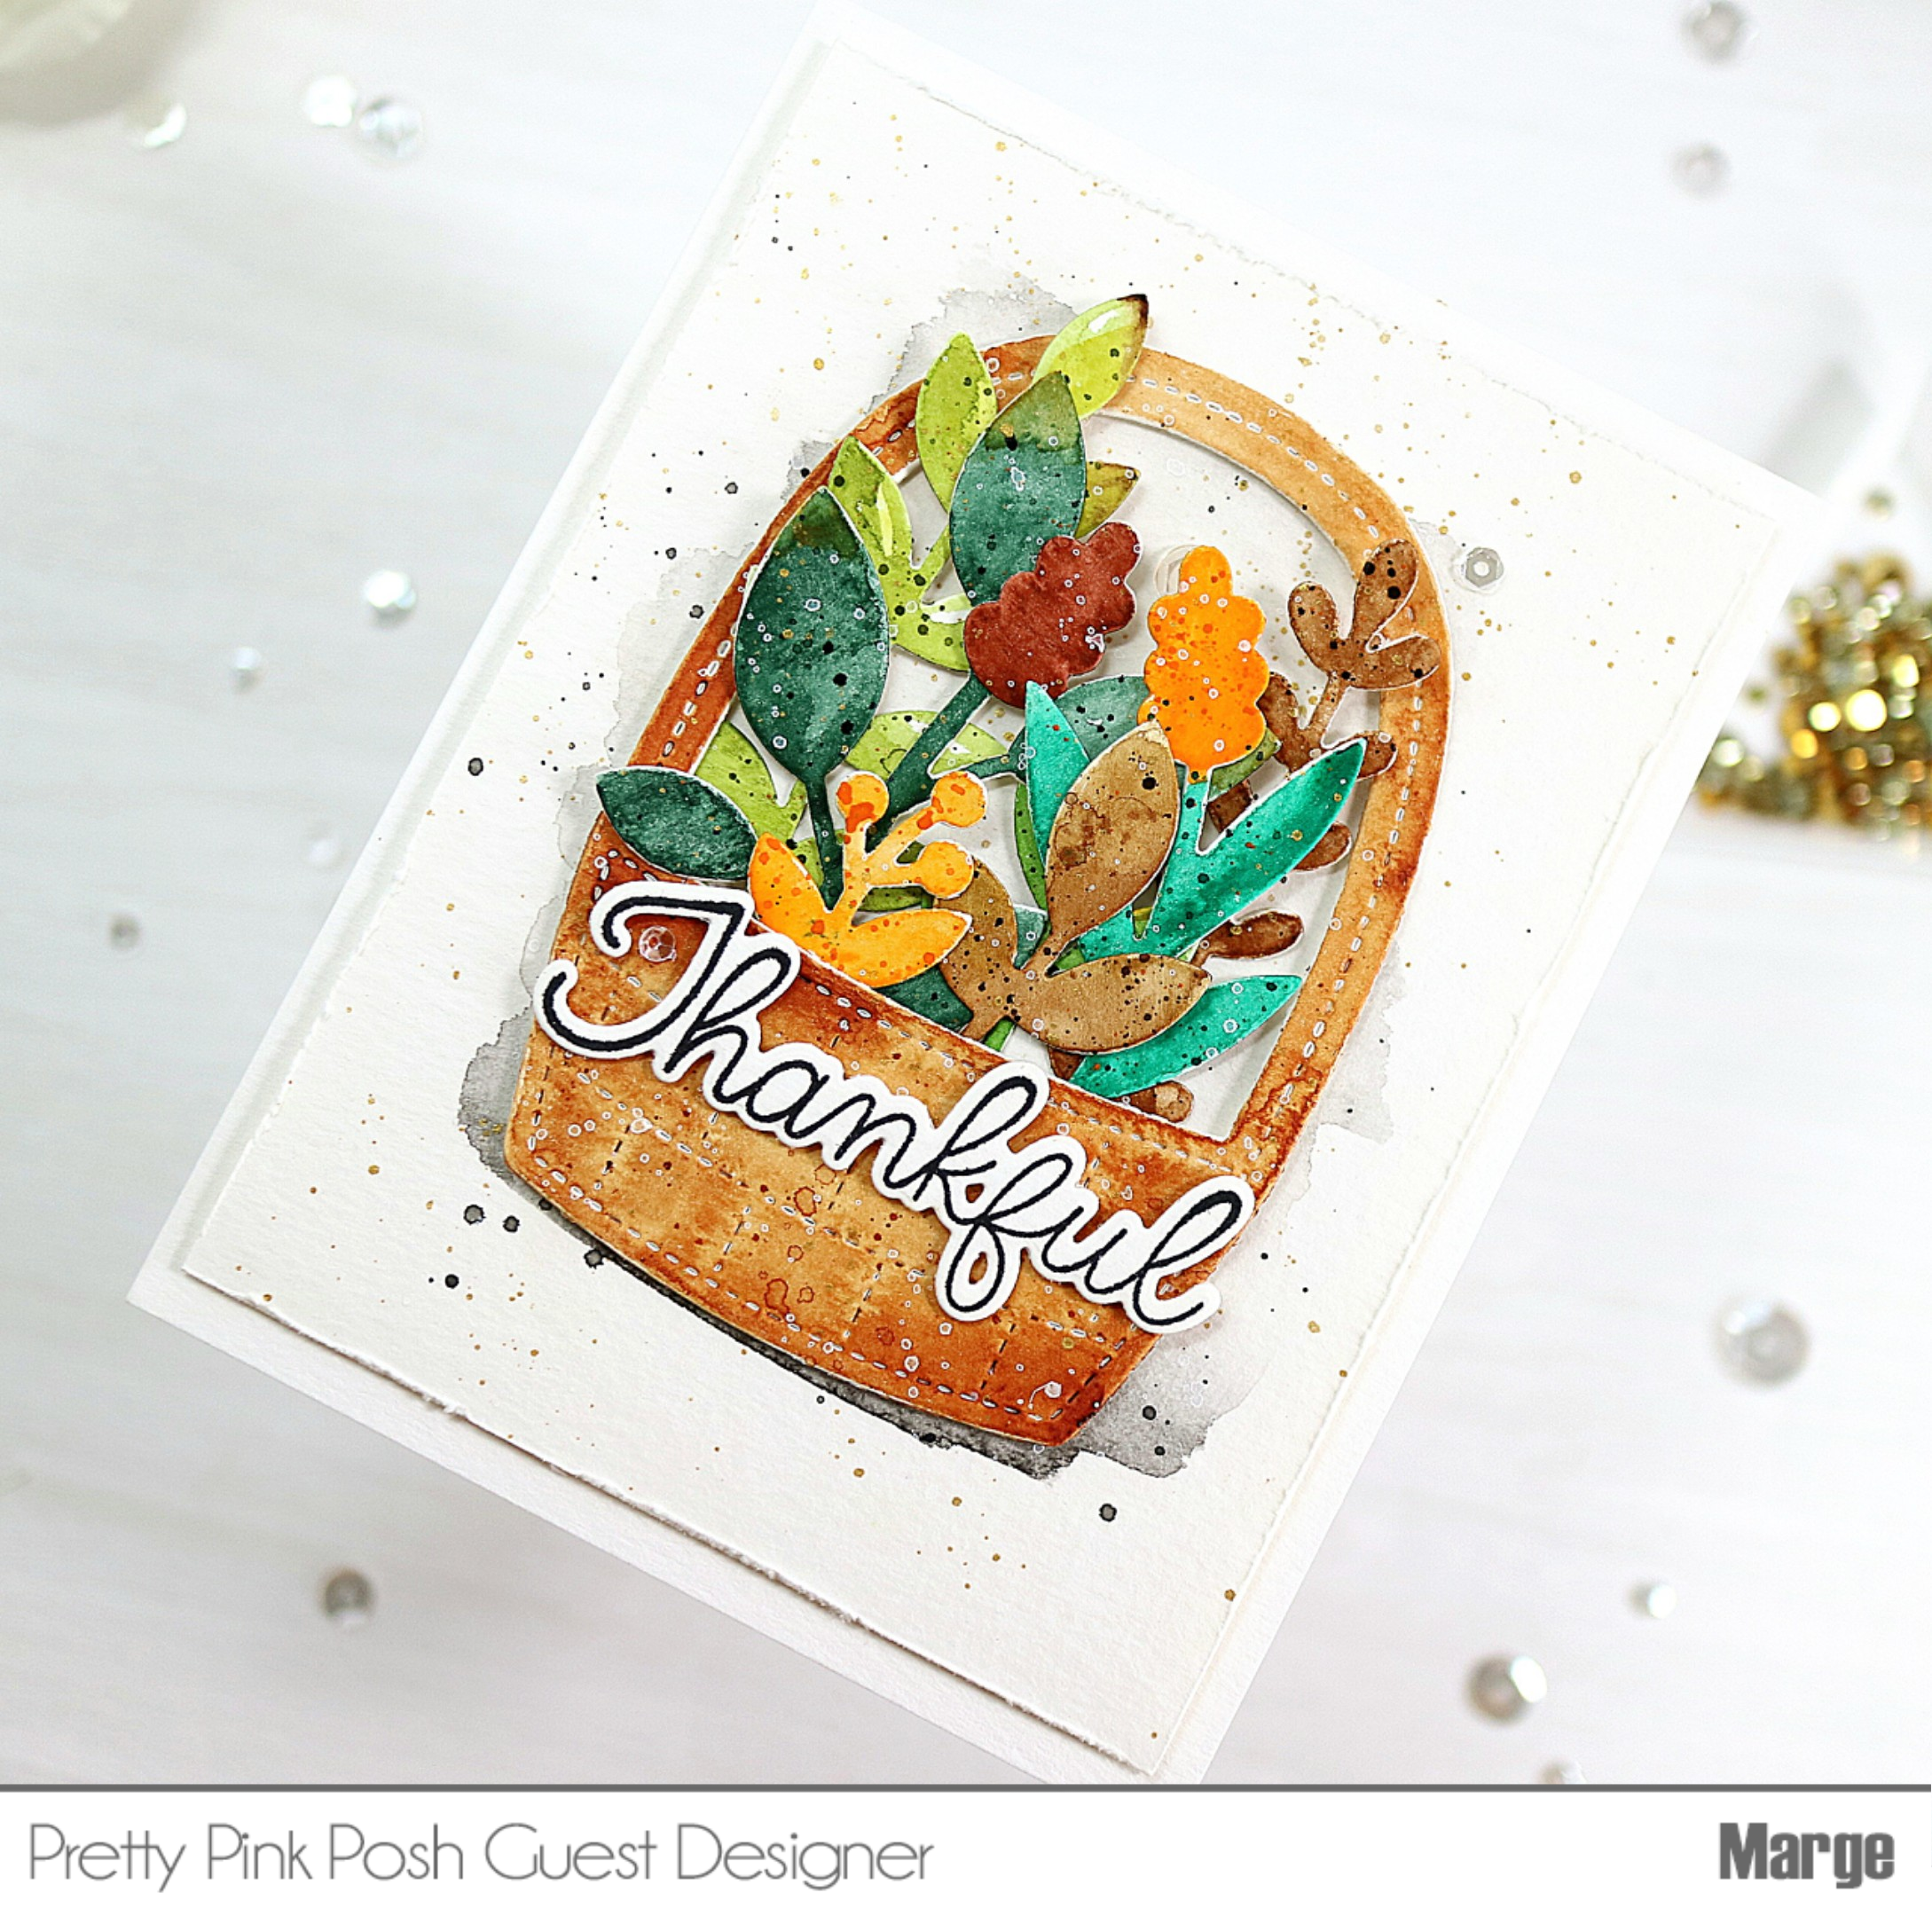
The last card was made in a similar way. This time, I colored the background panel with distress oxide inks Weathered Woods and Stormy Sky and framed it with a Winter Frame diecut. To make a snowy winter sky, I added white, black and gold ink splatters to the background! 


That's it for me for today. Thank you so much for stopping by and reading today's post. I hope you've enjoyed it.


 I hope you'll come over to Instagram hop and enjoy all the beautiful inspirations. 

Have a great day!

MARGE


Tuesday, October 18, 2022

Pretty Pink Posh October Release Blog Hop Day 2

 Hello and welcome everyone! 

It's the second day of Pretty Pink Posh October Release Blog Hop. Hopefully, you've arrived here from my talented friend Zsofia Molnar or you can start hopping along at Pretty Pink Posh blog.


Today, I'm going to share with you a few cards that mainly feature Pine Wreath Stamp set.


[ Giveaway Info ]

Please leave a comment for a chance to grab a $30 gift certificate. One winner each day will be picked randomly along the blog hop. Comments must be left by 11:59 PM PST on 10/24/2022. Winners will be announced on the PPP blog.


[ Blog Hop Cards Details ] 

The Pine Wreath image is so unique and has lots of design possibilities that it's one of my favorites from the new release and here's my first card using it. 


          Tips to make a real look pine wreath           

I stamped the wreath onto watercolor paper using regular distress inks Rustic Wildeness, Pine needles, and Crushed Olive. Then I brushed each pine needles along the stamped lines with a wet brush to add more realistic look to the wreath. By doing this, the original stamped lines would become blurred. So after I finished waterbrushing, I stamped again onto the colored images to get clearer pine needles. In order to stamp the wreath exactly in position several times, I used my mini-MISTI (or any stamping tool). I also paid attention not to move the panel on MISTI until I'm satisfied with all the lines and leafy shades while I repeated stamping and waterbrushing.  I made a couple of wreaths using the same process! I'm also sharing a short making video on my Instagram REEL (@marge.crafts), so if you're interested in watching it, please check my IG account. 


 After finishing the wreath I  stamped small ornaments from the same Pine Wreath set with Versamark ink, heat embossed them in gold and watercolored them. Next, I diecut all the images using Pine Wreath Coordinating Dies.


I prepared a backdrop panel by making transverse score lines with 0.5 inch interval on the same watercolor paper. I adhered the wreath onto the backdrop using foam adehsives , then I added lots of ink splatters. I love how the red, deep green and gold splatters themselves look like small ornaments and how they make more holiday mood to the wreath. Next, I adhered small ornamens around the wreath.


I heat embossed a sentiment 'joy to the world' from Holiday Sentiments Stamp Set in white on red cardstock and added it under the wreath and finished off the card. 

Moving on to my second card shown below, I took the similar design idea except that I added Winter Foliage diecuts to the pine wreath. 


These days I've been enjoying watercoloring of diecuts and this was no exception. I used Mijello Mission Gold Watercolor paints to color the diecuts. 


To add winter vibes, I splattered with white ink ( I used a white gouache) onto the images this time. I added a few Sparkling Clear Sequins for embellishment. 


The third card is quite simple! I didn't diecut the wreath but I just added a cute ribbon to the flat colored panel . I die cut Christmas Greetings Script out of white and gold glitter cardstock and glued only the "Christmas" piece on the center of the wreath. 


All the edges were distressed with a Timholtz Distressor, and then I added red and white baker's twine . I adhered some Clear Drops and finished it off. 


Lastly, the fourth card was made very easy and simple ! I heat-embossed all the images in gold and cut them out with coordinatng dies. No coloring!  


I die cut Merry & Bright Script out of white and gold cardstock paper and adhered "merry" on the center. For a clean look, I didn't add any embellishtment. 


By using deep colored card stock like navy, red, or plum etc you can get festive vibes like this. I bet this will be very easy, fun, and fast way for mass production of holiday cards :) You can try various combination of any colored cardstocks and pearl embossing powders  you would like to use and I can't wait to see what you'll make ! 


That's it for me today. Thank you so much for stopping by. I hope you've enjoyed my cards. Now, your next stop to move on is Carly Minner where I believe you can get such fun and creative ideas from her. 

Enjoy! 


      Blog Hop List     

Pretty Pink Posh blog 


Monday, October 17, 2022

Pretty Pink Posh New Release Day !


Hi, all!

The new October Release is now available at Pretty Pink Posh shop and it's all about holidays! The 3-days blog hop for the new release starts today at PPP blog so be sure to visit to check beautiful inspirations from talented crafters and get a chance for giveaways. 


My card today features Winter Foliage dies set from the new release. 
I diecut Winter Foliage out of watercolor paper and colored each peace using my Mijello Mission Gold watercolor paints. The detailed process is similar with my previous cards made with Fall Foliage dies


I also diecut Pine Sprigs dies to make more pine sprigs with various shapes. 


After I finished watercoloring, I let them dry, then I splattered with darker colored inks for each image. For the background I added subtle gray to a A2 sized panel using a blending brush. I then distressed all the edges with a distressor. 


I used foam adehsives or glues to compose a winter foliage bouquet. Sentiment "JOY" is from the Pine Wreath set which is also part of the new release. As a final touch, I splattered with metallic gold and white gouache all over the panel, then I added some clear drops. 


Thank you for reading today's post. I hope you've enjoyed it.
Happy Crafting ! 

MARGE 


Sunday, October 2, 2022

Watercolor Fall Foliage Cards - Pretty Pink Posh

 Hi, friends! 

Today, I've got two cards to share with you, and they're all about watercoloring of die-cuts. I used fabulous Fall Foliage Dies by Pretty Pink Posh


I started by diecutting all the Fall Foliage Dies out of watercolor paper. Since I didn't separate each element of this dies set, I could easily make various diecuts by just one diecutting. 


Next I watercolored all the diecuts using my Mijello Mission Gold watercolor paints. After coloring was done, I aadd splatters of each ink onto the diecuts. 


For the background, I trimmed a piece of same watercolor paper into 3.75x5 inch, and then I painted the center in light grey, added splatteres of black  and gold ink. When they're all dry, I adhered foliages onto the panel using glue and glue dots. Next I distressed all the edges using a distresser. Once again, I splattered with gold and white inks all over the assembled panel and let them dry. 


I wrapped the lower part of the panel with  two strings of twine and tied them in a bow.  The sentiment cut from Woodland Thanks Stamp set were foam mounted using foam adhesives. I foam mounted the panel onto a cardbase, adhered 3mm Sparkling Sequins and finished off my card. 


Moving on to my second card, I decided to use a basket to put foliages into it.  I die cut Easter Basket Dies out of watercolor paper and water-colored it in red-brown. 


Other processes are quite similar with the first card. I adhered the basket with dimension by using square foam adhesives, then I sticked colored foliages into the basket one by one using glue or glue dots. 


I love the natural mood from this red brown basket and it looks like a basket of flowers! 


Coloring of diecuts has become my favorite way of cardmaking these days. Because they're big enough and they have no visible lines actually, you don't have to worry about coloring mistakes. It's very fun and an easy way to add some beautiful colors to your cards. If you're not confident with coloring, I would recommend you to try coloring of diecuts first! (not stamped images) 


There are several ways of coloring the diecuts including copic markers, ink bleding, using colored cardstock with addition of a little shades or watercoloring like today's cards. I had shared a post where I showed copic coloring of the same foliage die cuts a while ago (Click here to read that post). So, this time I chose watercoloring and I think watercoloring goes very well with autumn design due to its comfy and loose feelings. 


Thank you for stopping by and reading this post. I'm also sharing a REEL of making these cards on my IG account (@marge.crafts) . Hope you'll enjoy it too. 


Have a great day!


Saturday, October 1, 2022

Autumn Greetings Card - PPP

 Hi, friends! 

I'm so excited to announce that I'll be guest-designing for Pretty Pink Posh this October and November. Through the two months, I'll be sharing my projects with new release as well as good old items from PPP. Hope you'll also enjoy them.  Today I've got a greeting card to share with you. I wanted to send to you my warm autumn wishes with this card. 


I started by making a background panel. I colored bristol paper with dye inks and I added watercolor paint splatters and white gouache. For hills, I added various dye ink shades to the yellow and green paper from Spiffy Speckles 6x6 paper pack (Lawn Fawn). I cut each border using Scallop Borders Die. Then I added more shades to the edges and splatters of various inks all over the panels. 


Next, I colored little cute images from Fall SignsGiving Thanks, and Autumn Wreath sets using Copic markers and then I cut them with coordinating dies.


Main copic colors I used are as follows.  
Squirrel: E09, E07, YR09,YR04,YR14,YR12
Pumpkin : YR09, YR04, Y38 mostly 
Sarecrow : YG99,YG97,YG95,YG93,YG91 / E09, YR09, YR04/ E29,E27,E25,E23,E21,E51,E50 /B99, B97, B95, B93/
Signboard: E31,E30,E0000,W05~06
Acorns : E77,E74,E71,E70, E47,E44,E43,E42
Red mushrooms : R39,R29,R24 
Teal&Orange leaves : B39,B37,BG13, BG09~01, YR09,YR07,YR04,Y38 
Green & Yellow leaves : G28,G24,G21,G20, YR04,YR38,Y17
Brown & Orange leaves : E09,YR27,YR24,YR23,YR21, R29,YR09,Y38 


Now, it's time to assemble the scene, which is the most exciting part of card making. 
For the hills, I adhered the first two layers using a tape runner, then I adhered the third & fourth giving dimension by using a thin foam tape to make space for little diecuts to put into. Before adhering signs, I stamped sentiments from Fall Signs set with Versafine Claire Nocturne ink. 


After I finished assembling, I added white gel pen details and 3mm Sparkling Sequins for embellishment. 


That's it for today. Thank you so much for stopping by. 
Have a great day ! 

Marge