Wednesday, April 11, 2018

[Pretty Pink Posh] Kites flying over spring breeze


Hello, there!
Spring is all around us, it is such a perfect time to make spring mood card.
7 I'm sharing a card featuring Fly A Kite Stamp set from Pretty Pink Posh, today.


To begin, I stamped Fly A Kite images onto a copic-friendly paper, colored them using copic markers and cut them all using the coordinating dies. 


Next, I trimmed a piece of paper into 3×4inch , then blended it with distress oxide inks to make a background for shaker.
I used Fossilized amber, Worn Lipstick, Cracked Pistachio, and Broken China.
I cut white cardstock using Scallop Frame Dies, then adhered an acetate film behind the diecut to make a window panel for shaker.


To make a shaker, I adhered Jewels (ButtercreamSea glass, and Pink blush ) onto the distressed panel using glue, so that the sequins won't go down when I hold the card up.
Then I placed 4mm clear droplets, 3mm clear sparkling sequins4mm Ballerina, and Seed Beads (Gold ShimmerClear SparkleDaffodilSpring Garden, and Lailac) on the panel, and then I covered the panel with the rectangle window using double sided foam tapes.


Once the shaker is finished, I adhered pink gingham paper onto a card base, then I adhered the shaker onto the pink background. I adhered stamped images onto the shaker using thin double sided foam tapes. 
Finally I put some Pink Blush Jewels to embelish the card.
Look at the beautiful sequins/Jewels/Beads in the shaker pouch! 
This is my favorite moment of cardmaking :)


Copic markers number
YG17-YG13-YG03-YG11
Y38-Y17-Y15
R43-R32-R30
B99-B97-B95-B93
Yr07-YR04
W00~W3

Since spring is all around, I went with soft pastel colors on my card, expressing kites flying over spring breeze. I loved how it turned out. 
Thanks for reading this post. Hope you enjoyed it.
Happy Shopping!

Marge


Monday, April 9, 2018

[My Favorite Things] Wednesday Sketch Challenge #379


Hi, friends!
Hope you are having a good start of day now.
I made two cards with designs based on the current Sketch Chellange Theme by My Favorite Things today.
(Click the image below to link to the site)


Here are my take on the sketch.
I did some background watetcoloring using my Daniel Smith Watercolor paints.


To begin, I heat embossed Sheet Music Background Cling stamp on watercolor paper, then I watercolored the panel.


For the top diagonal panel, I cut white card stock using Stitched Scallop Basic Edges 2 die, then I spread Nuvo glitter paste using Mini Raindrops Stencil.


I also heat embossed sentiments from Essential Sentiments set, then I finished off the card by adding some sparkling clear sequins and dew drops.


My second card is similar with the first one.
In this card, I added weathered wood ink before I did stencil with glimmer paste so that the raindrops looked light blue. 


Thanks for reading this post.
Have a wonderful day!

Marge


Friday, April 6, 2018

[Pretty Pink Posh] Simple greeting card using diecut background

Hello, crafy friends!
Welcome to my blog.
Today, I'm sharing a simple card with diecut background using Stacked Edges 2 dies from Pretty Pink Posh, which is so useful in making fun patterns.


I started with multipe diecutting using the hexagon shape die out of copic friendly heavy weight paper.
I then colored each cut using copic markers.
Yellow : Y31-YR21-Y21-Y11
Green : YG03-G21-YG11
Grey : W3-W1-W0
Blue : B95-B93-B91
Brown : E43-E42-E41


All stamped images in the card are from Bunny Friends Stamp set and were colored with copic markers.

After coloring, I cut hexagon diecuts to fit them in the 4.25inch  card base, then I foam mounted them directly onto a white card base.
I then adhered Bunny Friends Stamp set images using foam tapes.


Sentiment was chose from Everyday Greetings set, heat embossed on black cardstock. I used Stitched Speech Bubble dies  to cut the sentiment.  To embelish the card, I adhered various colors of Pretty Pink Posh Jewels here and there.


Thanks for reading, my friends!
Hope you are having a wonderful day.
Hope to see you in my next post :)
Marge♡


Visit Pretty Pink Posh for sale information until April 11th.


Thursday, April 5, 2018

[Simon Says Stamp ] Making cards using a frame die featuring Leaf Border Frame Die

Hello, there!
Hope you are having wonderful spring days.
Today I'm sharing my cards featuring Leaf Border Frame die from Simon Says Stamp. I loved this die at the very first moment I saw it after it had been released, but couldn't have had enough time to play with it.
So I'm very glad to make some cards from the die finally.


1. Tone on Tone Layering


For the first card I made tone on tone look by ink blending the diecut and background with similar colors.
Frame die was cut twice to give the card some dimensional look.

I used Bristol paper and distress inks (Faded Jeans, Peacock Feathers, Tumbled glass, picked raspberry, mustard, twisted citron, Mowed lawn, and Lucky Clover) .


Thanks sentiment was chosen from Big Thanks Words Stamp set, and was heat embossed on a navy cardstock, then I fussycut the sentiment.


2. Layering White Frame on Colored Background


For the second card, I used different color scheme.
Background panel was distressed using yellow distress inks(Rustic hinge, Wild honey, Mustard , Fossilized amber, Squeezed lemonade).


 Other diecuts were colored with copic markers.
Sentiments & Yellow leaves: E18-YR27-YR24 -YR21
Red Leaves : R59/R39 - R29- R14


3. Making Dry Embossing Background using Frame Die


For my third card, I used Dry Embossing technique to make an embossed pattern background. Sentiments which were also included in the die set were cut twice and then glued top on top. For embellishment, I also used small blossoms from Blooming Circle Dies set . All the diecut pieces were colored with copic markers.
Sentiments : W8-W6


4. Ink Blending on Dry Embossed Background


The last card is for celebrating 9th anniversary of Simon Says Stamp Wednesday Challenge. I did Dry Embossing again, then I ink blended over the panel uisng Distress Oxide Inks. I added splatters of gold pearl, dark ink, and white acrylic ink over the panel.


I heat embossed Even More Spring Flowers Set on vellum paper in gold, then colored on the back of the cuts using copic markers.
Sentiment from Big Greetings 1 set was also heat embossed.

Copic Markers are
Yellow blossom : E18-Y38, YG97-YG95
Pink Blossom : YG03-Y38-RV04
Leaves : BG18-YG03-BG15
Brown stem : E18-YR27-YR24


I'm entering this card into the current SSS Wednesday Challenge : Happy Birthday.


I'm also entering three of these cards to the SSS Flickr Challenge #94, where the theme is Ink Blending!


For all the cards, I used various colors of Pretty Pink Posh Jewels as final embellishment.

That's it for today.
I've shared four ways of using one frame die this time. Hope you enjoyed it.
Thank you my friends an have a good day !

Marge ♡


Tuesday, April 3, 2018

[Altenew] No line coloring of flower bouquet

Hi, there!
I'm in love with watercoloring these days, and today I have a no line watercolor card to share with you.


When I made cards showcasing the March Release Stamp/Dies from Altenew, I stamped a couple of panels using the Dearest Friend set just in case. So I decided to use one of them today. 


The image was stampes on a hot pressed watercolor paper using Antique Linen distress ink. 


I did watercoloring using my Daniel Smith Watercolor paints. Main colors were Phthalo Turquoise and Ultramarine Turquoise. I used a fine tip brush to give the flowers shades. 
After I finished coloring, I splattered dark ink and then I cut the panel using Scallop Borders 2 Dies from Prertty Pink Posh.


I then foam mounted the panel on a light-brown pattern paper, and then I adhered them onto a card base. 
Sentiment was chosen from Adore You set and was heat embossed on black card stock, then was foam mounted on the background.
I finished off the card by adding some Pretty Pink Posh Jewels


That's it for today. Thanks so much for reading this. Have you enjoyed it?


Hope to see you again in my future posts.
Have a good day!

Marge


Monday, April 2, 2018

[Simon Says Stamp] Watercoloring Cosmos background, Part II

Hi,there!
I'm going to share a watercolor card today, featuring Cosmos Background Cling Stamps from Simon Says Stamp.


I acutally made the similar card before, when I had another stamped panel left after I had finished it. 
I've been keeping it in my stash, and I finally had a free time to play with it again.
As the previous card was colored in red & violet , I decided to try blue colors this time.


The first step is stamping it using versafine onyx black ink onto a heavy weight watercolor paper. I used 300g/m^2 cold pressed paper here.
Because the stamped image was 6×6 inch sized,  I trimmed the panel into 4×5.25 inch, then started watercoloring.


I used my favorite Daniel Smith Watercolor Paints including Phthalo Turquoise,  Ultramarine Turquoise, Quimacridone Burnt Orange as background colors for petals. I also added shades of other colors to give it visual interest.


Sentiment was chosen from Altenew Adore You Stamp set and was heat embossed on a vellum strip.


After I was aatisfied with all the colors and shades, I foam mounted the panel onto a card base, adhered some Pretty Pink Posh Jewels ( Buttercream & Aquamarine) as an embellishment.


Have you enjoyed my post? 
Here is the previous card I colored, which has been my favorite card so far. I love it so much and now I need to choose what to favor, lols. Which one would you prefer? :)
If you are interested in the red one, you can read the post here.


Thanks for reading this.
Hope you will enjoy your day!

Marge♡


Challenge entry : Simon Says Stamp Wednesday Challenge

Sunday, April 1, 2018

MFT Wednesday Sketch Challenge #378


Hi, Friends!
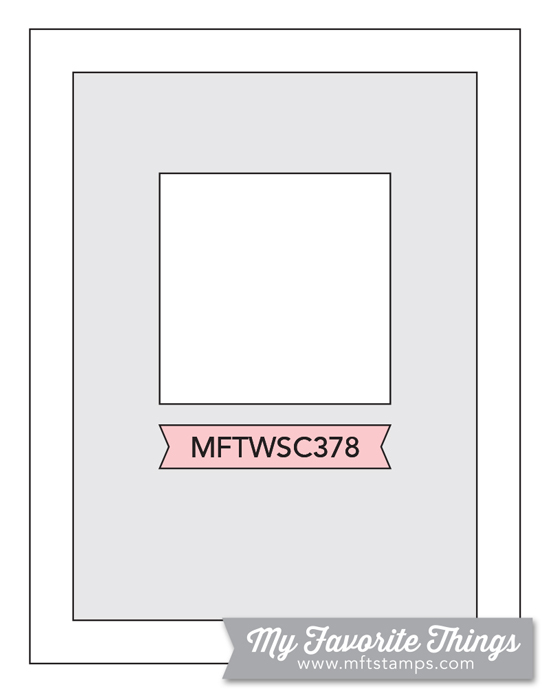
I'm sharing a spring themed card playing along with the current MFT Sketch Challenge #378.


This card was made following the sketch below.


I started with stamping and copic coloring of Hoppy Friends set. I also cut from Rolling Hills and then colored with copic markers.

Copic No.
Chick : Y38, Y17, Y15, Y11
Bunny : W00, W0, W01, W03, R20
Fence : E57, E59


For the background panel, I inkblended it using Tumbled Glass, Mermaid Lagoon, Salty Ocean, Twisted Citron, and Mowed Lawn.
Sentiment was selected from Essential Sentiment and was heat embossed. 


I made a square window using Sq PeekaBoo Window die, then I built a scene combining all the elements using foam tapes. 
I finished off the card by adding some Pretty Pink Posh sequins and jewels. 


Thanks for reading this post. I hope you enjoyed it.
Have a great day!
Marge♡


Friday, March 30, 2018

Lawn Fawnatics Challenge #25 - Color Inspiration

Hello, Friends!
Today I'm sharing a clean and simple card for the current Lawn Fawnatics Challenge #25, which celebrates 8th year of Lawn Fawn and first anniversary of Lawnfawnatics.


The challenge theme is Color Inspiration as shown below, with beautiful rainbow colors.


I started with stamping and coloring of balloons using copic markers. I colored them in rainbow colors.


Then I trimmed a background panel into 3.75×5 inch. 
I chose a rainbow pattern paper, trimmed it into 4.25×5.5inch, then adhere it onto a cardbase. 


I put the white panel on the pattern background using thin foam tapes. 
I adhered foam tapes in diagonal direction so that the tapes cannot be seen through the tiny holes of the panel.


Then I foam mounted balloons and sentiments on the panel.
Finally, I glued some jewels then I brushed Wink of Stella on the balloons to give some sparkling effects.


That's it for today.
Thanks for reading this post.
Congrats on your 8th birthday, Lawn Fawn!

Marge


SUPPLIES

6×6 Really Rainbow paper pack, Lawn Cuts-Quilted Backdrop, Simply Celebrate Stamp set, all from Lawn Fawn, and Pretty Pink Posh Jewels