Tuesday, June 12, 2018

[Pretty Pink Posh] Geranium cards


Hi, there!
Hope you are having a lovely day.
Today, I would love to share with you my two cards featuring Geraniums Stamp set by Pretty Pink Posh. To make these, I used my favorite watercolors with pencil details added.


To begin, I stamped Geraniums images on 300g watercolor paper multiple times by using Versafine Onyx Black ink. Then I watercolored them using my Daniel Smith Watercolors. Once watercoloring was done, I added more shades using my prismacolor polychromo pencils. Then I cut them all using Geraniums Coordinating Dies.


For my first card, I trimmed a piece of watercolor paper into A2 size, then I watercolored the background and added splatters of dark ink and white ink. I also ink blended bottom part using distress ink Gathered Twigs and Tea Dye.


 I stamped a sentiment from Thoughful Greetigs on the sky.
To place my Geraniums, I diecut a white fence using Picket Fence Dies, glued it on the panel, then I adhered blossoms and leaves using glue and foam tapes. 


I foam mounted the panel onto A2 card base then finished it off by adding Sparkling Clear Sequins Mix, 6mm & 4mm Ballerina Pink, and 3mm Sparkling Clear sequins.  


For my second card, I decided to go with a shaker card using the new Seed Beads from Pretty Pink Posh.


I diecut a smaller piece of Scallop Frames Dies out of 110 Neenah white paper. For background, I cut A2 sizes Bristol Paper and then ink blended it using Distress ink : Worn Lipstick, Tattered Rose , Squeezed Lemonade, Fossilized Amber, and Wild Honey.
After I put my sequins and sead beads onto the center of the panel, I adhered window frame over them using Darice double sided foam strips.


I love to put various sequins and beads into my shaker, so this time I used Sparkling Clear Sequins Mix, Mini Sparkling Clear Flower, 4mm and 6mm sequins (RaspberryStrawberry Burst, Blush & Ballerina Pink, Sunshine Glow, Lemon Meringue), Seed Beads ( Blush Seed Beads, Rose Pink,  Cotton CandyPewterGold Shimmer, Sparkling Clear, and Purple).

Can you spot all the sequins and beads I mentioned? ;)


I adhered my Geraniums on the two corner of the shaker as shown, then I adhered Love You Script diecut I made with Simon Gold Glitter Card Stock. I cut two more pieces from white card stock to give the script some dimension.


Once I put the panel onto A2 card base, I added Blush Jewels and Ivory Jewels around the blossoms.


Daniel Smith Watercolor paints I used are :
Quinacridone Coral, Quinacridone Magenta, Rose of Ultramarine, Imperial Purple , Quinacridone Violet, Quinacridone Gold, Alizarin Crimson, Quinacridone Rose, Phthalo Green, Sap Green, Phthalo Turquoise, Prussian Green, Burnt Umber, Cobalt Teal Blue.


That's it from me today. Thank you for reading this. Hope you enjoyed it.
Have a wonderful day!

Marge♡


Sunday, June 10, 2018

[Isabel Cristina Digital Stamp] Bella Italia Sets


Hi, friends !
It is a new day of a new week which means my friend Isabel Cristina releases new digital stamp set - Bella Italia !
You can have lots of lovely items themed with Italian tour from this set. 
Here is my card for it.


I printed the images on 80lb Neenah White Paper, then cut them all using my Scan N Cut and then colored the images using copic markers. I also stamped a sentiment from Messages For Everyday on the flag. 
I ink blended some of my MFT dye inks (Kraft, Natural, Peach Bellini, and Coral Crush) on a piece of Bristol Paper, then I framed it with Scallop Frames Dies cut using Darice Double Sided Foam Strips.


I adhered my colored images using foam tapes, then I adhered the panel onto A2 card base I made using Fog Gray Card Stock.


That's it for today. I hope you will enjoy the new lovely Bella Set.


I'm so sorry to say that I'm stepping down from Isabel Cristina Design Team, so this is my last official designing card. As I love her Bella series so much, I'll sometimes share my cards with her digi stamps.

Isabel is one of my best friends and I really appreciate our friendship. She is so talented and sweet as well.
If you love elegant, cute and lovely images and you love to be inspired on coloring and designing, follow her @isabelcristinanl on Instagram

Thank you .
Happy Crafting !

Thursday, June 7, 2018

[Pretty Pink Posh] New June Release


Hi, there !
It's officially a New Release Day by Pretty Pink Posh, so I'm sharing my cards that I made with some of the new products that Pretty Pink Posh has introduced today on her Blog and You Tube Channel.


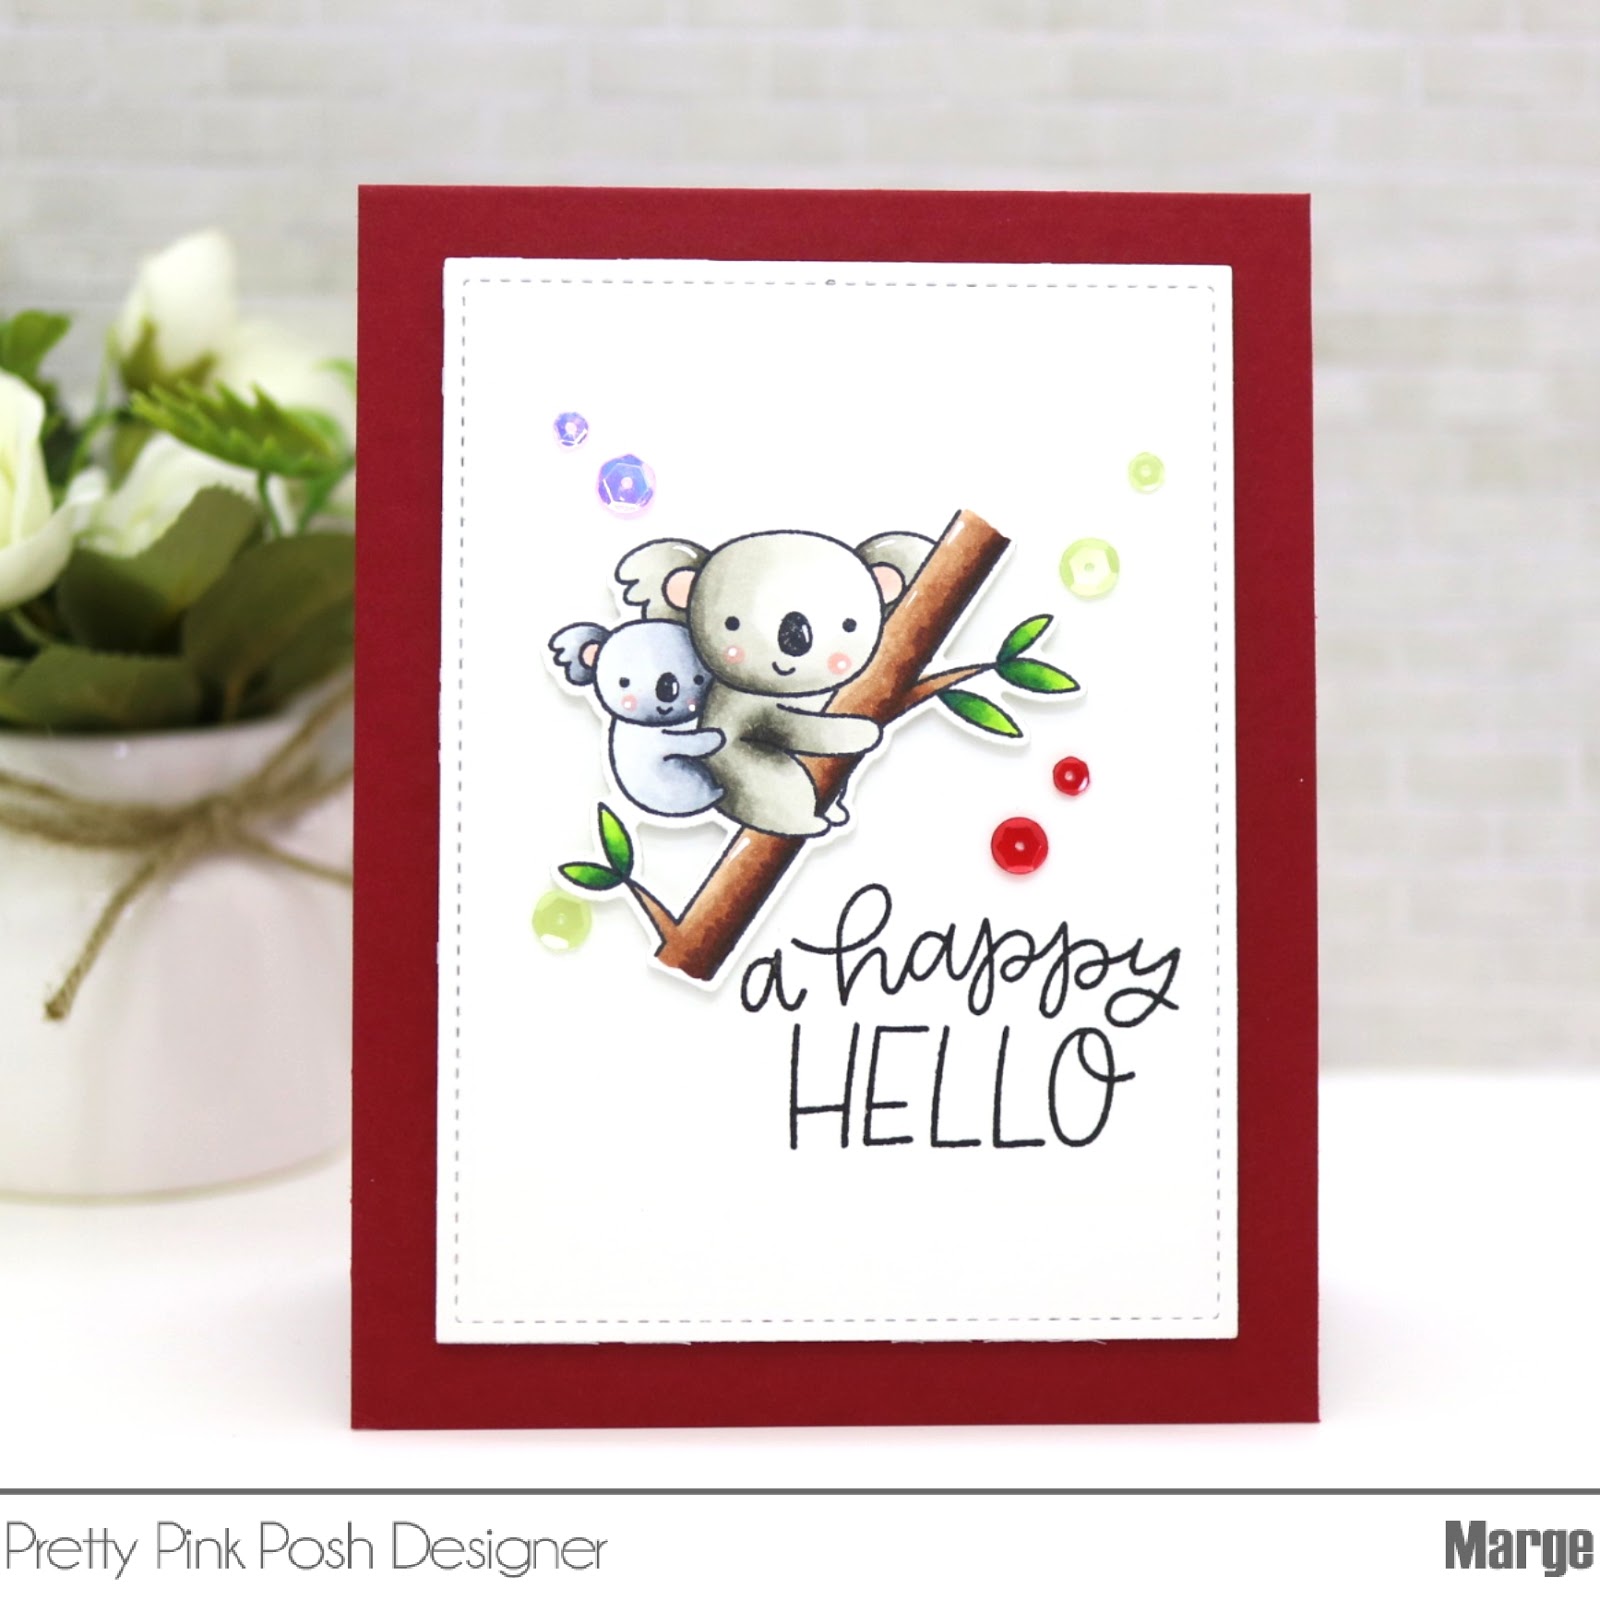
I started by bunch of stamping the Koala Friends and Darling Dragonflies on copic friendly paper then I colored them with copic markers. I cut the images using Koala Friends Coordinating Dies and Darling Dragonflies Coordinating dies. I used my Sidekick to cut these small images cause I found using smaller machine is easier for me. 


Main copic colors I used for Koalas are E29-E18-E15-E13-E11-E01. For the grass, I used BG09-G29-G07-YG03-YG01. 

To make simple cards, I cut stitched rectangle panel using Stitched Notes Dies out of 110 Neenah White Paper.


For the red card, I stamped sentiment in the Koala Friends Stamp set, then I foam mounted the Koala dircut. I foam mounted the panel onto A2 sized top-folded card base I made with Schoolhouse Red Card Stock by Simon Says Stamp.


I added some Pretty Pink Posh Sequins : 4mm Raspberry, 6mm Raspberry, 4mm Lime Sorbet, 6mm Lime Sorbet, 4mm & 6mm Ballerina Pink which is included in the Spring Blossom Sequins Mix.


For the Grey Card, I added script diecut Love You, which was colored with copic markers : RV99-RV69-R89. Sequins are 4mm Raspberry, 6mm Raspberry, 4mm Ballerina Pink


For the Lemon card, I stamped a sentiment from Simple Sayings - Miss You. I used Lemon Chiffon Yello Card Stock from SSS for card base. 
Sequins are 4mm Lime Sorbet6mm Lime Sorbet, 4mm and 6mm Sunshine Glow which are included in the Mermaid Sequins Mix.


That's it for today.
Thanka for reading this post. I hope you enjoyed it.
Have a lovely day and Happy Shopping!♡


Marge


Wednesday, June 6, 2018

Simon Says Stamp Wednesday Challenge : Anniversary /Wedding


Hi all and welcome to another week on the Simon Says Stamp Wednesday Challenge

This week the challenge is

Anniversary/Wedding 


We are showcasing Impression Obsession Products this week. You don't have to use them to join in but if you have some we would love to see them used.

As always Simon Says Stamp will be giving away a $50 gift Voucher  for the Simon Says Stamp Store  to one randomly selected winner !


Here are my cards for the challenge inspiration.


To begin my first card, I stamped a beautiful bouquet from Floral Bliss by Simon Says Stamp Exclusive, on a piece of watercolor paper using Wow Embossing Ink Pad . Then I applied Wow Embossing Glitter Clear Sparkle on it  and then heat set it. I colored the images using my Zig Clean Real Brush Markers then I fussy cut it. 
I die cut Wonky Rectangle out of 110 Neenah White Card Stock, then ink blended it using Distress Oxide Worn Lipstick and Tattered Rose, then added water splatter on it. 


Next, I diecut MR & MRS Dies  out of Simon Says Silver Glitter Card Stock, and I made two more diecuts using white card stock, and then I glued them top on top to give dimension.
I put the diecuts and colored bouquet onto the panel using glue and thin foam tapes. Then adhered the panel onto A2-sized pink card base I made with Simon Says Cotton Candy Card Stock. I embellished the card by adding 6mm and 4mm Ballerina Pink Sequins and 3mm Sparkling Clear Sequins from Pretty Pink Posh. 
I love glowing look from silver glitter card stock, Wow embossing glitter, and iridescent sequins all together. 


For my second card, I stamped Verbena Blossom stamp on watercolor paper, then I watercolored it using my Daniel Smith Watercolors, and then I cut the panel using smaller Wonky Rectangle die. I also cut white card stock using MR & MRS Dies and then applied Wow Embossing Glitter Midnight Dream by using adhesive, then heat set it. 


I diecut two lovely pattern papers using larger Wonky Rectangle die and then adhered a half piece of top panel onto the other. I rounded white ribbon and lace, then I mounted my watercolor panel onto them using foam tapes. I embellished the card by adding Pretty Pink Posh Sparkling Clear Sequins Mix and 3mm Sparkling Clear Sequins


So now it's YOUR turn.  Happy Crafting !
You have until Wed  8am Ohio time. 1pm UK time, 2 pm CET to join in.
New creations only, please don't link projects published before the start of the challenge, Only 5 new creations will be eligible in the prize draw.


Do you use Instagram ?  If so please add  #ssswchallenge to your challenge entry uploads so we can see them on there too !

There are fabulous Giveaways and inspiration from fabulous designers on a daily basis over on the Simon Says Stamp Blog, if you haven't subscribed by email you may want to so you don't miss out.


Thank you so much for your stopping by and reading this. Have a wonderful day.


Marge ♡


Wednesday, May 30, 2018

Simon Says Stamp Wednesday Challenge : Anything Goes


Hi all and welcome to another week on the Simon Says Stamp Wednesday Challenge

This week the challenge is

Anything Goes


We are showcasing Doodlebug Products  this week. You don't have to use them to join in but if you have some we would love to see them used.

As always Simon Says Stamp will be giving away a $50 gift Voucher  for the Simon Says Stamp Store  to one randomly selected winner !


Here are my cards for challenge inspiration. 


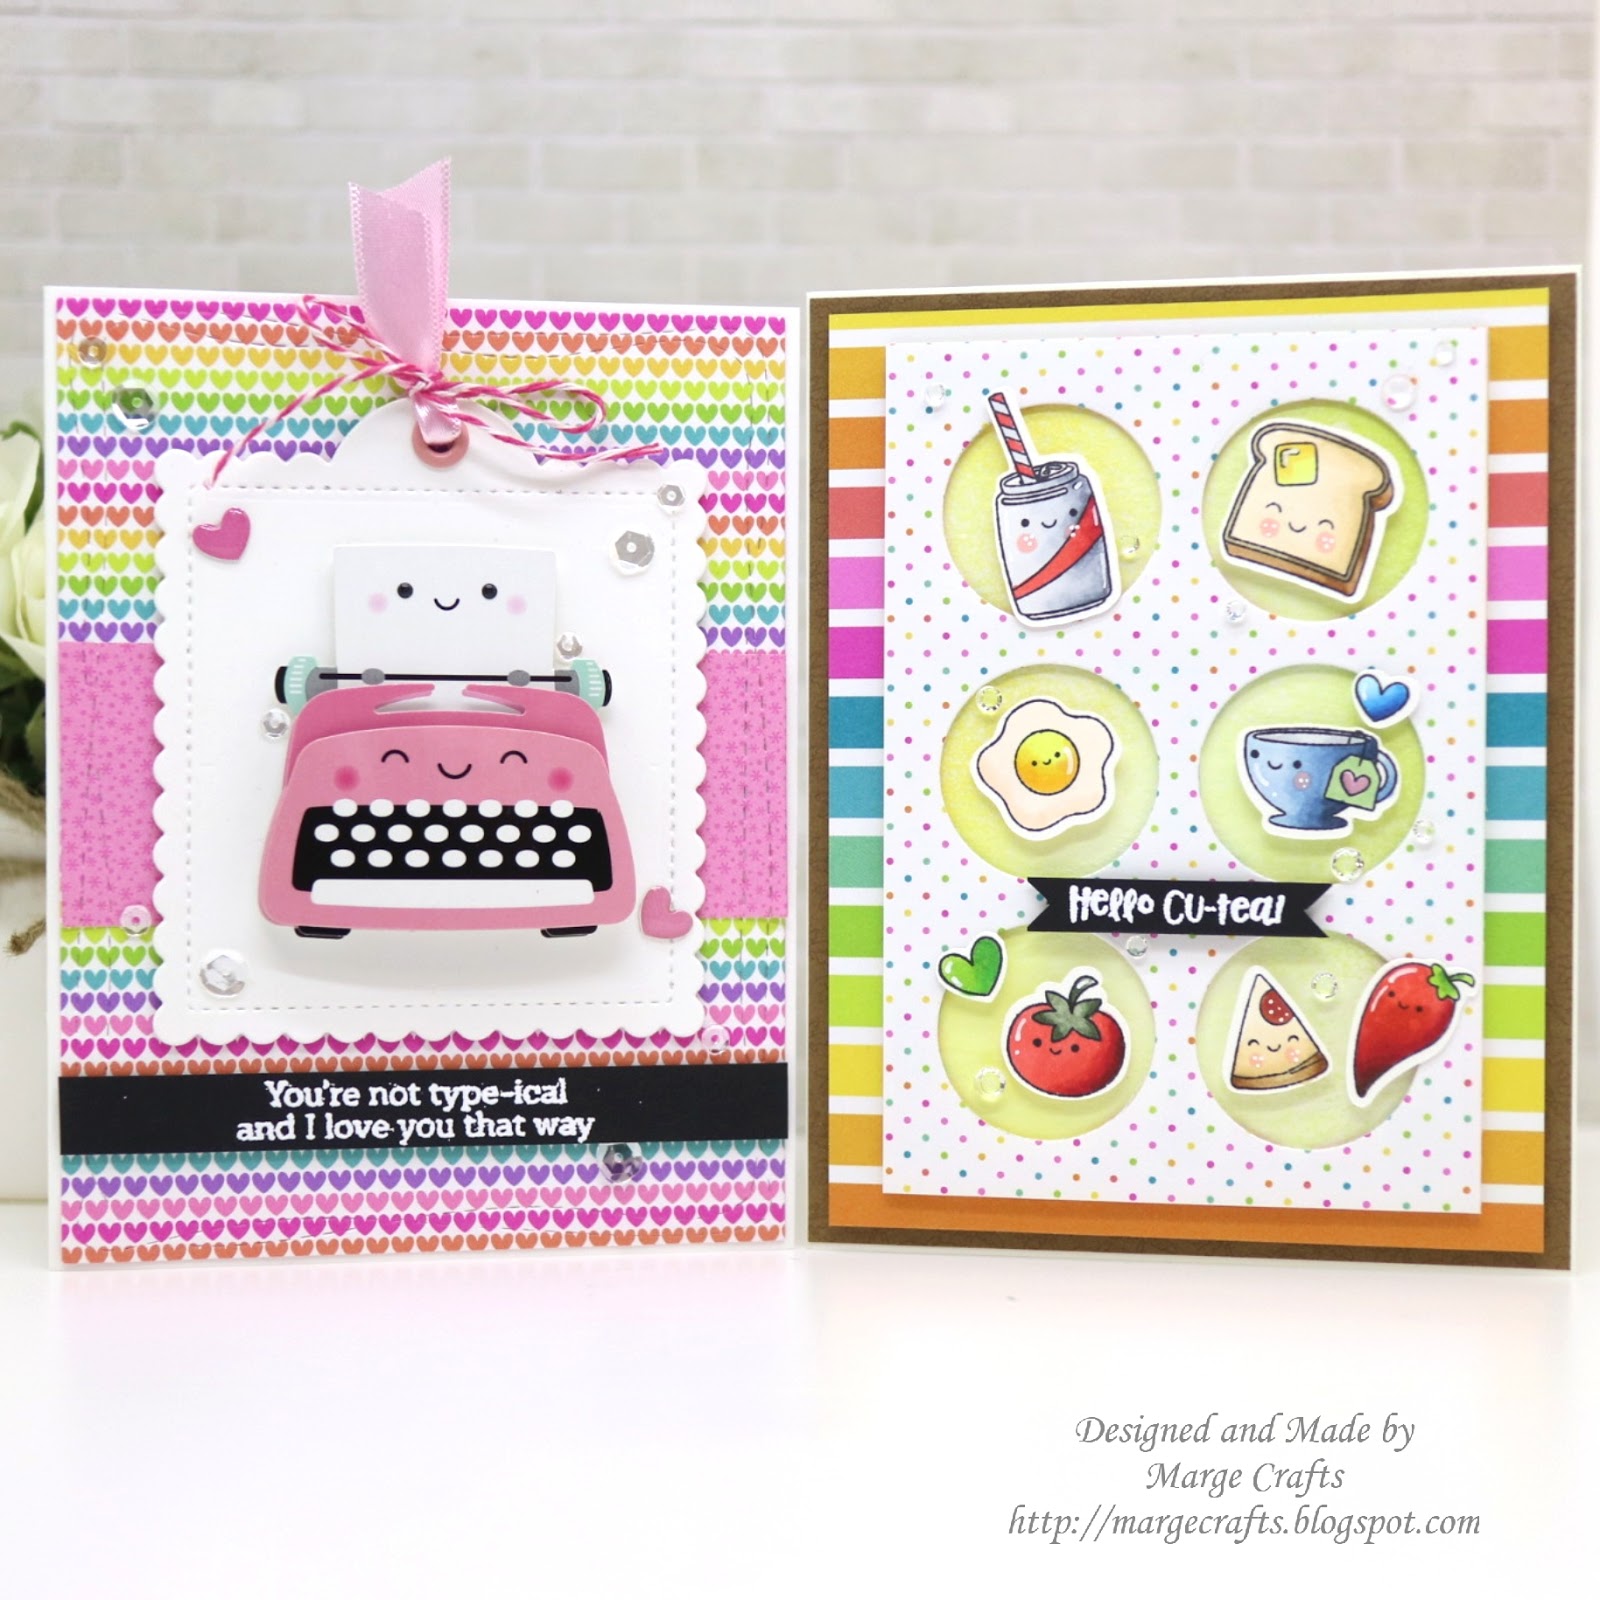
The first card is featuring Sweet Summer 6×6 Paper Pad from Doodlebug.


I started by stamping Breakfast Buddies and Foodie Friends Stamp sets from Simon Exclusives on  80lb Neenah White using Memento Tuxedo Black ink. I colored the images with copic markers then I cut them all using my Scan N Cut, or you could use Breakfast Buddies Coordinating Dies and Foodie Friends Coordinating Dies.


Next, I trimmed a piece of small dots pattern paper from Sweet Summer pad into 3.25×4.75 inch then I made 6 circles out of it using Repeating Circles Dies
I foam-mounted the circles panel on one of my previously colored panels, then I placed stamped images in the circles by using foam tapes
Sentiment from Breakfast Buddies was heat embossed on black card stock in white.


Next, I chose big rainbow- stripes pattern paper and tan mini palm trees pattern paper from the same Sweet Summer Pad, and trimmed them to be used as mats for my foodie panel. I used Simon Says Ivory Card Stock for card base. As a final embellishment, I added Pretty Pink Posh Sparkling Clear Jewels.


The second card is for featuring Fairy Tales 6x6 paper pad and Pen Pal Sticker from Doodlebug.
I diecut Scalloped Square Tag out of 110lb Neenah White Paper, then simply foam mounted Pen Pal Sticker on the tag. I also adhered two mini heart stickers that were included in the Pen Pal Sticker.


I chose two pattern papers from Fairy Tales 6x6 paper pad, cut them using Wonky Rectangle Dies. I further cut only mid part of pink dots paper then I adhered it on the rainbow hearts panel. Scallped tag was then put onto it with a little bit dimension using thin foam adhesives.

Sentiment was chose from Foodie Friends Stamp set and was heat embossed on black card stock in white. Then I cut it as a long strip and then I foam mounted it under the tag.


I embellished the tag and the card by adding more details including pink eyelet, ribbon, twine, and Sparkling Clear Sequins.

Which one is your favorite ? :) ♡


So now it's YOUR turn.  Happy Crafting !
You have until Wed  8am Ohio time. 1pm UK time, 2 pm CET to join in.
New creations only, please don't link projects published before the start of the challenge, Only 5 new creations will be eligible in the prize draw.


Do you use Instagram ?  If so please add  #ssswchallenge to your challenge entry uploads so we can see them on there too !


There are fabulous Giveaways and inspiration from fabulous designers on a daily basis over on the Simon Says Stamp Blog, if you haven't subscribed by email you may want to so you don't miss out.


Thank you so much for your stopping by and reading this. Have a wonderful day.


Marge ♡


Tuesday, May 29, 2018

[Pretty Pink Posh] Fuchsia floral cards

Hi, friends!
Today, I'm sharing a couple of cards I made with Flourishing Fuchsia Stamp set by Pretty Pink Posh.


To make this card, I stamped images on watercolor paper using distress ink Antique Linen, then I colored them with Daniel Smith Watercolor paints.


Then I added splatters of dark ink and white ink and I drew lines in brown using Copic Twinkling Marker Chocolate.


I diecut Lovely Script Die three times and glued them top on top. Top diecut was colored using copic markers : E49, E47, E44, E43.
"YOU'RE" was chosen from Bear Hugs stamp set.


Then I foam mounted the panel on Neenah Texture gray card base using foam tapes.


Finally I embellished the card using Metallic Rose Gold Jewels, Ivory Jewels, and 3mm Sparkling Clear Sequins.


The next card is the one that was shared on Pretty Pink Posh Blog for May Release Blog Hop.


You could get details about this card in the original post here. I'll summarize quick information on the supplies and technique I used.


Copic markers :

Blue : B39-B06-B04-B02-B00
Pink : RV25-RV23-RV21-RV10
Green : G14-YG03-YG01

Shaker sequins/jewels/ seed beads : Sparkling Clear JewelsIvory JewelsLemon Drop JewelsAmethyst JewelsWatermelon JewelsParty Time Mix sequins3mm Sparkling Clear sequinsGold shimmer Seed Beads, Lilac Seed Beads, and Daffodil Seed Beads.

I really love how the colors I chose look well together in shaker, flowers, and external embellishment.


Thank you for reading this post.
Happy Crafting!♡

Marge