Sunday, August 7, 2022

Nautical Mood Standing Pop-up Card


Hi, everyone!
Today, I've got a standing pop-up card with fun nautical mood to share with you, using products of Pretty Pink Posh. 
To make this card, you don't need special dies set or difficult techniques. Using any border dies you have in your stash and a scoring board would work. 


Here's a quick guide of cutting and scoring I made for you for your future projects. I planned the final card would fit into 4.25 x 5.5 inch so that it can easily be put into an A2 envelope. But, you can modify this blueprint in various ways once you set the final card size in your mind. 


I started with trimming light blue cardstock into 4.25 x 6.75 inch and I scored straight lines at 1.25 and 5.5 along the 6.75" side.  


I then pulled out a scallop border die from the Scallop Borders 2 Set, and made the top outline a scalloped curve. Because the die was shorter than the length of top line, I trimmed out the remnants using a scissor. 


For the front stacked panels, I trimmed and scored lines white cardstock as guided in the picture above. Then I cut each top lines using Stitched Borders 1 Die set for a wavy look.


I applied glue on the left tab of each stack and adhered it on the left side of background panel. When all the three stacks were adhered, I applied glue to the right tabs , fold the right wing of background panel to adhere to the tabs. To make sure all the tabs and wings stick together, I used a bone folder to rub the folded lines. 


Onc the standing background was finished, I adhered colored images from Nautical Set, which I stamped using Memento black ink and colored with copic markers and die cut using Nautical Coordinating dies.  I also added a whale from Sea Friends set for a lovely look. 


I used glue and foam squares when needed for dimentional look. After all the images were adhered, I embellished it with 3mm sparkling sequins, and light blue sequins. 


Here's a fun look showing how the scene looks like when each wing is folded. 

Left Wing Folded


Right Wing Folded


Nautical theme has always been one of my favorites and I love this Nautical set by Pretty Pink Posh so much. It's so cute, lovely and fun to color in. 


I hope you enjoyed today's card. 
Thank you for stopping by!
REEL will be soon shared on my Instagram account. If you're interested in the process video, please check it out. 

Marge


Saturday, August 6, 2022

Lemon Zest Shaker Card


Hi, all!
Today, I'm sharing a tropical themed shaker card made with mixing old and new products from Simon Says Stamp. 


To start with, I die cut Lemon Zest out of colored cardstock paper (Lemon Schiffon Yellow, Green Apple, and Sea Glass) , colored the diecuts using distress inks & dye inks and set them aside. 


Next, I cut Island Blue Cardstock into A2 size (4.25 x 5.5 inch), then I ink blended it to make night sky  with blue distress inks / dye inks until I'm happy with it.  Inks I used are Uncharted Mariner , Peacock Feather, Faded Jeans Oxide , and Galaxy. Then I made a circle window with leafy border in the middle of the panel using the Circle Leaves Dies set. 


 For a bottom panel of shaker, I cut a piece of Bristol paper into A2 size , then I gently brushed the center with two inks : Tumbled Glass Oxide and Squeezed Lemonade Oxide. 


I adhered a piece of acetate sheet on the back of the front panel, then I applied foam tapes around the circle to make a shaker well. After putting various sequins and seed beads into the well,  I covered it with the bottom panel and finished a shaker. 


Next, I adhered Lemon Zest diecuts around the shaker using glue and foam adhesives  as shown in the pictures, then I heat embossed a gorgeous sentiment from Vintage Garden in gold. I cut the block using Vintage Garden Words coordinating dies, then I adhered it on the right lower corner of the panel. 


I adhered the shaker onto a card base. Before finishing my card, I added white accents, gold and white splatters and 
Midnight Black Jewels on all over the panel for more interesting look.


  I love how the combination of dark navy panel and bright lemon/leaves make tropical night look and how it pops on the soft colored shaker background. 


Thanks for stopping by today. I also made a short video (REEL) of making this card and shared it on my Instagram account. If you're reading this post on your desktop, you can click the widget on the right to check my IG account. You don't want to miss it! 

Have a great weekend.

Marge 

Simon Says Stamp August 2022 Card Kit inspiration

 Hi, all!

I finally got my parcel of SSS August Card kit a few days ago, but haven't had a quality time to play with it. 

Today, I pulled out the products and quickly made three cards. No difficult techniques or layouts at all. 

Just stamping, light coloring, and diecutting, which are basic elements of cardmaking were used. 

I think the August card kit is perfect for making some sympathy cards. Love the tone down colors and elegant letters in the stamp set. 


  For the first card, I die cut the pattern papers included in the kit and some colored vellum paper with Stitched Dress Up Tag dies and Wavy Scallop Stitches Border Die. I layered each piece using glue and foams. 
Sentiment was heat embossed in heat using the silver embossing powder which was also the kit element. For a neat and elegant look of sentiments blocks, I purchased additional coordinating dies set for them and I'm very happy with how they look :) 


For the second card, I stamped floral images in the Vintage Garden Set all around the outlines of white panel with a brown ink, (Memento Rich Cocoa) , then I colored in the images using my Copic Markers. 

Blue : B97-B95-B93-B91
Brown leaves : E49-E47-E44-E42


I then gave it more texture by running the colored panel through my Big Shot in Picnic Floral embossing folder . Well....it was kind of going out my comfort zone. I would say adding textures by dry-embossing to a colored panel makes some interesting look. 


For the last card, I didn't give any texture to the panel. Just stamping and coloring in the same way as the 2nd one finished a gorgeous look of floral background. I love the autumn colors in my today's card. How about you? 


Copic colors I used are : BG78/BG75/BG72/BG70 for leaves, E47/E44/E42/E41 for flowers

I also shared a REEL of making these three cards on my Instagram account(@marge.crafts). If you're interested in it, please click the IG widget on the right column of this blog ( with PC mode) to check it out. 

Thank you so much for stopping by. 
Have a great weekend.

Marge 


Sunday, July 24, 2022

Two Floral Watercolor Cards


Hi, all!
I'm sharing two floral watercolor cards using the Simon Says Stamp Sketched Flowers set.


For no line or softer line look, I used Distress Ink Tea Dye and Antique Linen.
I then colored in the images with water color paints 36 pan from Altenew. 


Can you tell the differences between Tea Dye and Antique Linen in the two cards ? 


After I finished watercoloring, I added more shades with Prismacolor pencils and splatters of gold, white and black using Prima Metallic Accents.


Next, I stamped sentiments on the white empty space suing Versafine Onyx Black.


I then foam-mounted the panel on a card base, added some sequins and finished off my cards. 


Thank you for reading today's post.
Hope you'll have a good start of a new week.


Friday, July 15, 2022

A Floral Card with Layers Scalloped Rectangles

Hello, friends!
Today, I'm sharing a floral card with a custom background to join the current Simon Says Stamp Wednesday Challenge, where the theme is "Make Your Own Background". Plus, I'm also entering this card to the current Simon Says Stamp Monday Challenge with the theme "Fabulous Florals". 


As I said in my previous post, these stamped background and floral images had been made years ago and been kept in my stash for years. 


For the bottom background,  "You Are" cling stamp were used, which was I diecut it using Wrapped Scalloped Rectangles from Memorybox. Using the same set  I cut vellum and white paper in smaller size to place them on the background layer by layer. Before applyingit, the smallest white diecut was ink blended with Distress Ink Speckled egg and Saltwater taffy. 


Next, I composed floral bouquets around the scalloped panels using the stamped images from Fleur Impressions Set by The Greetery.


I added some splatters of blue, white, and gold all over the panel, then I foam mounted "Delightful" which was heat embossed in pink gold. 


After I foam mounted the finished panel onto a cardbase, I added beautiful iridescent sequins for embellishment. 


 It didn't take much time for me to finish the card as all the stamped pieces had been made while ago. Thank you for joining me, today. 

Happy Saturday! 

Thursday, July 14, 2022

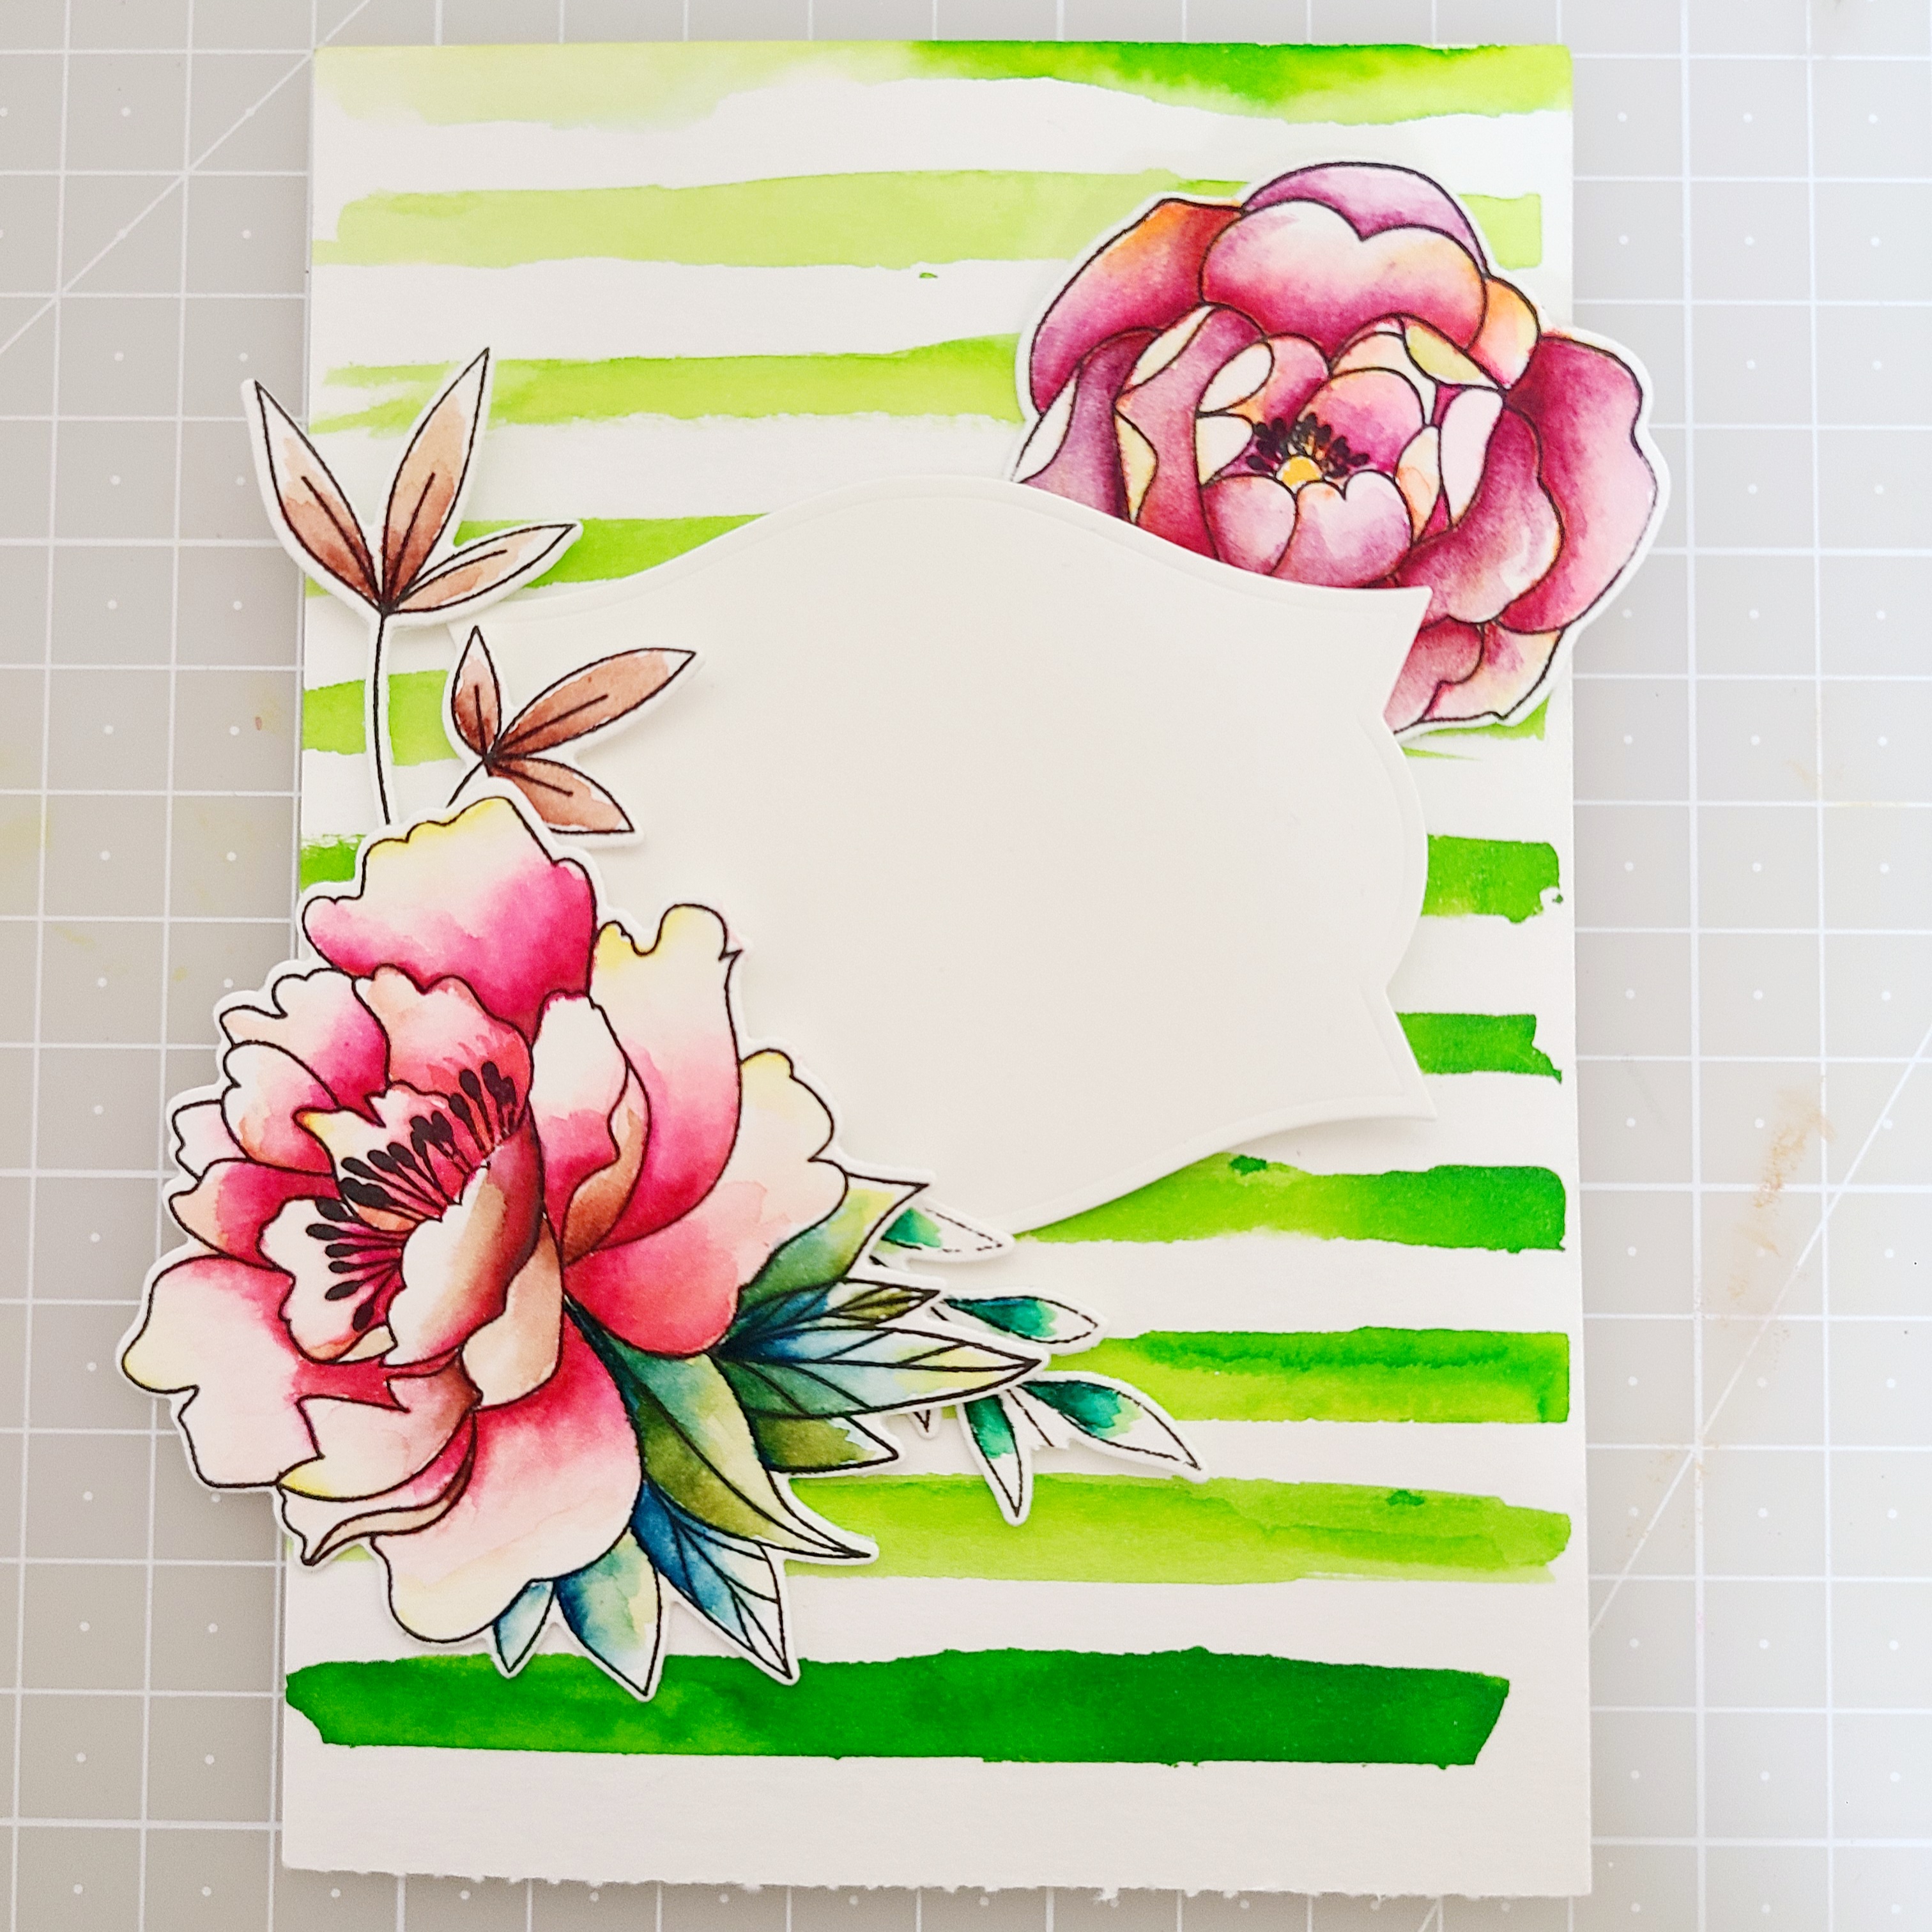
Watercolor Striped Floral Card

 Hi, everyone!

These days, I've been cleaning my craft desk, re-organizing stamps and tools after a long break. Meanwhile, I found bunch of remnant scraps such as colored pieces, diecuts, colored background panels, which had been left from my precious works. You know how difficult it is to discard those things even after you finish your cards ! 

So, today, I decided to utilize the scraps that have been sleeping in my stash for years to make a new card. 


For design composition, I placed a few floral pieces and a label diecut on a watercolor striped panel. 


I then stamped sentiment from Moment of Grace using Gina K Black dye ink  . I adhered the pieces using glue and foam tapes to create dimensional look. 


At the last step of assembly, I decided not to use the smaller bloom. So this is the final look.  I added some white and gold splatters all over the panel and then let them dry.


I then mounted the panel onto a cardbase using foam tape, embellished it with gold and sparkling sequins. 


I love how the green watercolored stripes panel goes well with the floral images. I think I need to make more watercolor stripes for my future cards. 


The floral images are from Delicate Flowers Stamp & Die set. The beautiful blooms and leaves in this set are big enough to color easily and they also have elegant outlines, which I love so much. 


The floram images had been colored with  Altenew Watercolor Brush Markers, but I don't remember what paints I used for stripe panel, lols. 


Well, that's it for today. 

Thank you for reading today's post. I'm entering this card to the current Simon Says Stamp Wednesday Challenge where the theme is " Make your own background ". 

Have a great day! 

Wednesday, July 13, 2022

Simon Says Stamp Two Floral Cards - sitting back on my craft desk again


Hi, everyone! 

It's been about 2.5 years since my last blog post, and I'm so happy to sit back on my craft desk again. First of all, I'd love to thank my crafty friends who have thought of me while I was absent in this society. 

Today, I'm sharing two floral cards  featuring some Simon Says Stamp products  colored with alcohol markers. 


[ Card 1. Printmaking Florals Card]

Here's the first card  featuring  Printmaking Florals Stamp set from SSS STAMPTember 2021.


 I love the simple geometric outlines of this set, which enables easy coloring and is perfect for someone just starting crafting again after so long. 


I colored the stamped images using copic markers, added white dots and lines, then I added a diecut frame with 3 layers for dimensional look.


I love how it looks like a framed postcard. After I mounted it onto a cardbase, I added a red strip with a text heat-embossed in white.


As a final touch, I embellished my card with some sparkling sequins.


- Copic Marker Colors -
leaves : B18, BG18, BG13, YG25, YG23
blue flower : B99, B97, B95, B91, B21, BG70
ground : E34, E33, E31, E30, Copic liner


- Materials & Tools -


[ Card 2. Etched Flower Buds Card]

My second card for today features a couple of SSS dies.


I colored Etched Flower Buds diecuts with various Copic markers and Nuvo markers, and then I glued them on top of a panel with a round window made with Sunny Days Die. The background panel was colored with Distress Oxide Inks : Mermaid lagoon, Twisted Citron. Other materials I used are Thankful 1 die, Eucalyptus Leaves Die, Stitched Rectangles Die, and Sugar Plum Jewel Mix.


Thank you so much for reading today's post. 
Have a great day! 

Marge