Hi, friends!
Recently I had had some break time from crafting for about three weeks and I got back to my desk a couple of days ago. I had fun with the new Cozy Hugs Release products from Simon Says Stamp and I made four cards to share with you.
Card 1. Snowy Acorn House Card
When I first saw this
Acorn House Die, I came up with an image of cozy & warm cabin in the snowy winter scene. So I decided to make a winter cabin using the acorn.
3. Cut A2 size of Bristol paper, color the sky using distress inks Salvaged patina and Evergreen Bough , color the bottom using
Snowfall and Banks stencil and various warm colors : Tattered Rose, Dried Marigold, Carved Pumpkin, and Picked Raspberry
4. Apply white aqoua molding paste over the background panel and Acorn House Diecuts through
Snowfall and Banks stencil to make a snowy scene. 5. Die cut Christmas Foliage out of white cardstock and colored the diecuts using the same distress inks. 6. Add splatters of white gouache and metallic gold ink all over the panel and diecuts.
8. Die cut
Snowy Greetings out of white glitter cardstock and vellum paper.
9. Now it's assembly time! Use glue and foam adhesives to compose all the pieces together.
Card 2. Merry Words Card
I made a similar background using the Snowfall and Banks stencil and the same Distress inks. For a color variation, I used ivory cardstock instead of white paper, so the background color looks like mint or soft bluegreen and I love how the colors turned out. Because of the soft pastel colors of background, I wanted to create some fairy tale like mood.
I die cut mini trees from Tim Holtz Mini Christmas Things Die set out of Fog cardstock and slightly added colors using Altenew Dye inks (Plum, Rubellite, Yellow Ochre, Lagoon) and blending brushes.
I die cut
Merry Words Die out of white card stock and vellum paper and for the word 'merry' , I cut three layers and glued them for diemnsion. The sentiment is from
Tiny Words Christmas stamp set. For embellishment, I used new
glitter drops Leaf, which I adore so much these days.
Card 3 & 4 : Merry Ornament Cards
1. Apply distress inks Barn Door and Fired Brick to Canson Bristol paper, then used the same inks to stamp
Tim Holtz Perfect Plaids.
2. Trim the panel into 3.75 x 5 inch
3. Distress all the edges using
a distressing tool, add darker ink like Ground Espresso around the corners and edges.
4. Die cut
Merry Ornament out of gold glitter and vellum paper. For dimensional look, cut two ~ three more pieces of merry frame out of white cardstock and glue them under the gold glitter diecuts.
5. Adhere the ornament to the background and splatter with white and gold metallic inks all over the panel.
6. Mat the front with a little larger white cardstock which was also distressed on the edges and inkblended with Tea Dye.
7. Adhere the front onto red card base.
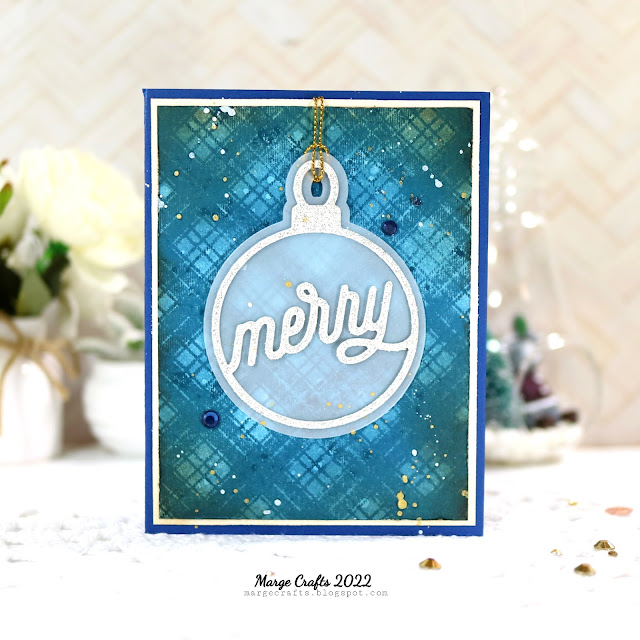
And for my last card, I used distress ink
Uncharted Mariner as the main color and Ground espresso and Tea Dye for more shades.
For
Merry Ornament, I used Diamond Glitter paper from the Stamp Market.
When I make vintage style cards - well I'm not good at those - , I enjoy to use combination of dark blues and brown, which gives some masculine and nautical mood.
Well, I took lots of photos with various settings for my cards and it was so difficult what to choose! So I'm sharing two more photos here.
Thank you for reading today's post!
Have a great day :)
MARGE


All these cards are AMAZING! You are so talented! I think the second one is my favorite!
ReplyDelete