Pages

Friday, August 30, 2019

Autumn Greetings Card with Copic coloring on Kraft paper

Hi, everyone!
I have a new autumn greetings card featuring some of the new release products from Pretty Pink Posh. This card was shared on the Pretty Pink Posh Blog a week ago as Day 2 of New Release Blog Hop.


 I started by stamping Bear Friends and Fall Signs on 80lb Neenah White paper using Memento Black Ink, then I colored the images using my Copic Markers. I cut them all using Bear Friends Coordinating Dies and Fall Signs Coordinating Dies.


Next, I stamped Fall Borders on Neenah Desert Storm Paper using Distress Ink Antique Linen for a no-line look, then I colored in the images using my Copic Markers as well. After the coloring was done, I added more shades using my colored pencils. 


If you haven't tried Copic Markers coloring on kraft paper yet, I would definitely recommend you to try it as it is very easy and fun. The Neenah Desert Storm Paper is so smooth that Copic markers are blended very well on it. Since the paper is a little dark, your Copic colors are not as bright as those on white paper, which creates an overall tone-down look perfect for the autumn mood. Plus, you can hardly see coloring mistakes on this dark paper as well.  


Next, I adhered my colored images onto the kraft panel to create a lovely autumn scene. I also added pumpkins and leaves from Pumpkin Patch CrittersAutumn Wreath, and Giving Thanks Stamp set.


At first, I was doubtful of putting images that were colored on white paper with black lines onto a kraft background full of no line images. But, in the end, I love how it came out and I hope you'll like it, too. 


As a final touch, I adhered some Metallic Gold Jewels and Marigold Jewels and finished off my card.
Thanks for reading!
Happy Fall 😊

Marge

Monday, August 26, 2019

On Stamp Going #1 - Sailboat shaker card


Hi, all! 
Today, I'm sharing a special project with you. I recently joined a local online stamp art community which is called On_Stamp_Going, where 19 members, each with her own unique styles, gather together sharing their works on a monthly basis. 

Each month, we're given the same items (shown below) and should make one project using the given items with mandatory use of more stamps & dies of ourselves. 


Now let's take a look at how I used them. The sentiment stamp is from IO stamps. I ink blended the panel with light blue inks and made a big square shaker by covering  it with Square Scallops Dies and I put beautiful sequins and seed beads in it: Sparkling Clear Sequins, Mini Sparkling Clear Flower Sequins, Gold Shimmer Seed Beads,  and Sparkling Clear Seed Beads. When I make shakers, I usually use double-sided sticky strips.


The sailboat is from MFT Die-namics, which is no longer available, and I colored it using my Copic Markers. The background grid paper was also ink blended with Distress Tea Dye Ink


I added natural twine with a clip on it and the sentiment from CZ Clean Line Everyday Stamp set was heat embossed in white on red cardstock.


I'm a little late in posting this card on my blog. We officially post our cards on the 5th of each month. So I'll be back with another new project on the 5th of September. 
Thanks for reading this post. 
Hugs

Marge

Sunday, August 25, 2019

Reverse Confetti Lemonade Stand Card


Hello, Crafty Friends! Today, I'm sharing a card using the Lemonade Stand Stamp set from the new release at Reverse Confetti. This is the last card I've shared for the two months as a guest designer for Reverse Confetti. I'm so grateful to Jennifer, Amy and Fetti Crew for giving such a precious opportunity to me. I had so much fun! 


I started by stamping and coloring the Lemonade Stand Stamp set using Copic Markers, I then cut the images using the Lemonade Stand Confetti Cuts. I adore this stamp set so much that I had wanted to use it again in my future card(s).


I cut a piece of colorful dotted pattern paper from Sun & Sea 6x6 Paper Pad into A2 size and adhered it onto a navy colored card base.


I foam mounted a white Grid Stitched Tag in a diagonal direction, and then I adhered my colored images around the tag. In order to add lemon-full mood to the card, I added a yellow ribbon on the top of the tag.


The sentiment from Lemonade Stand Stamp set was heat embossed in white on navy cardstock. Finally, I embellished my card with some iridescent sequins.


That's it for me. Thanks for stopping by and I hope you'll have a wonderful day.

Marge


Tuesday, August 20, 2019

Pretty Pink Posh August 2019 Release Now Available !

Hi, everyone! The new release at Pretty Pink Posh is officially live and I'm sharing two cards with you, today. I'm featuring Bear Friends Set from the new release and here goes my first card. 


I started by stamping and coloring Bear Friends Set using Copic Markers and cut them all using Bear Friends Coordinating Dies


In order to make a background for the bears, I decided to create a sky with clouds using Stitched Borders 2 Dies.
I had once made a cloudy border stencil out of acetate film by die-cutting it with Stitched Borders 2 Dies, which I had been keeping for reuse. 
Using my DIY Stencil and some dye inks, I made an ink-blended background as shown below. For the hill, I simply cut another piece of acetate film in a negative hill shape by freehand and used it as a stencil. 


Once I finished my panel, the next steps were very easy. I just adhered my colored images to create a scene using Glue Dots and foam tapes. 
I also adhered several images from Woodland CrittersPumpkin Patch Critters, and Autumn Wreath Set to make the scene into an autumn one. Next, I added white accents to the images using a 10mm ball white gel pen. 


A sentiment from the Bear Friends Set was heat embossed in white on a red tag mad with Stitched Labels 1 Dies, which was adhered on the left upper corner, and then I embellished my card using Sparkling Clear Sequins Mix and 3mm Sparkling Clear Sequins


My second project for today is a shaker card using the new pumpkin-shaped Grateful Shaker Die.


I started with Autumn Leaves Stencil, which is also part of the new release to make an autumn scene.
In detail, I ink blended a piece of A2 sized Bristol paper using the dye inks shown below, then I placed Autumn Leaves Stencil onto it and inked through the stencil again to create a tone-on-tone look. I made another panel with lighter colors to be used in the shaker background. 


I diecut Grateful Shaker Die two times and glued them together for a dimensional look. The top layer was colored slightly using Copic Markers.
I adhered images from Bear Friends Set and Pumpkin Patch Critters Set around the shaker, adhered the shaker onto a card base and finished it off. 


Thanks for reading today's post. Happy Shopping! 

Marge

Monday, August 19, 2019

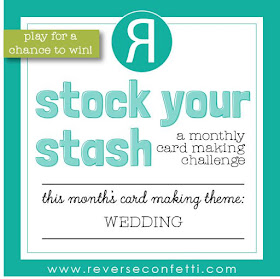
Reverse Confetti August Stock Your Stash Challenge


Hi, friends! I'm back with a new card for the Stock Your Stash Challenge going on over at the Reverse Confetti Blog. This is a monthly challenge where you can apply your card(s) or project(s) which fit the theme during the whole month. And the theme for August Challenge is Wedding


Here's my take on it. 


I started by stamping and coloring Cake & Champagne Set using my Copic Markers. I then cut the images using the Cake & Champagne Confetti Cuts


I rounded white & gold ribbon around the hearts cover panel and then I foam mounted Hex Tag on it, which was embellished with heart-shaped eyelet. Before mounting the tag, I stamped sentiment from the Cake & Champagne Set. 


In turn, I adhered my colored images including the floral bouquets and wine glasses around the tag. Finally, I embellished my card with some iridescent sequins. 


Thanks for reading today's post. Reverse Confetti is having a 20% sale for summer which goes through today, so you don't want to miss the chance! 


Circle of Hearts Cover Panel Confetti cuts


< Challenge Information >


There will be a new Stock Your Stash challenge posted on the Reverse Confetti blog on the 1st of each month. The SYS link list will be open from the 1st until noon CST on the 29th of the month. Reverse Confetti stamps and/or Confetti Cuts are required to win.  This is a way we get to thank our customers for using our stamps.  Anyone is welcome to play, though!You may enter as many times as you wish.Use #SYSChallenge when playing along with this challenge.There will be a random winner selected each month and that person will receive a $20 gift certificate to the Reverse Confetti store. The winner of the challenge will be posted on the Reverse Confetti blog at the end of the month. 


Monday, August 12, 2019

Pretty Pink Posh Toucans Card


Hi, friends! Today, I'm going to share my last summer card featuring Pretty Pink Posh products. 


I had colored Tropical Toucans with Copic Markers a while ago, but I didn't put them into a card. So I decided to use these cute images this time. 


I made a soft colored stencil background using the Tropical Background Stencil with Distress Oxide inks (Spun Sugar, Spiced Marmalade, and Twisted Citron). I then splattered with pearl ink onto the panel. 


I thought Stitched Films Strip Die would be a perfect nest for toucans, so I foam mounted it and then I added toucans and branches around the die-cut.


I added sentiment from Sea Friends Set and then I finished off my card by adding dome Sparkling Clear Sequins.


Thanks for reading. I hope you enjoyed it :) 

Marge


Thursday, August 8, 2019

Reverse Confetti August Blog Hop


Hi, crafty friends! I'm so excited to join the August Blog Hop for Reverse Confetti. This time, we're showcasing any ABC projects but a card, so I'm going to share a wedding garland with you. 


 Since I wanted to put letters "L.O.V.E" on my banners, I used a mini alphabet punch board.


I thought Stitched Hex Tag Dies would be perfect for making a banner so I made four Stitched Hex Tags. Next, I stamped images from Bold Blooms, Happy Mail, and  Cake & Champagne sets, colored the images and then I cut them all using the coordinating dies. I also heat embossed butterflies from Butterfly Blossoms in white on vellum paper.


In turn, I embellished my tags using colored images and alphabets using glue or foam-tapes give them some dimension. For "L", I added Happy Mail images.


For "O", I adhered Bold Blooms images around the letter.


For "V" and "E", I added lovely images from  Cake & Champagne sets.


I matted each tag onto another layer which I cut from the same paper as of alphabets and then finally embellished my garland using some iridescent sequins.


Thank you for visiting here and reading this post. I hope you enjoyed it.
In case you have missed some blog hop stops, here's a hop list full of new beautiful inspiration. 


< Blog Hop List >

Marge Yoon (You are here)