Hello, everyone and welcome to my blog!
Have you ever participate in the Simon Says Stamp (SSS) Flickr Challenge?
It's a fun craft challenge which is held every 2 weeks by Simon Says Stamp Flickr Group.
It's a fun craft challenge which is held every 2 weeks by Simon Says Stamp Flickr Group.
The challenge rules are simple, the themes are always very versatile, and there's higher chance to be randomly picked as a 25$ gift-voucher winner than other challenges !
I'm honored to be a guest designer for the new SSS Flickr challenge #72 which starts today with a theme "Summer Fun".
I'm very grateful to Simon Says Stamp Flickr Team and especially to Barbara Engler who is the host of SSS Flickr challenge for inviting me to be guest designing.
That was a great experience for me since I'm only a beginner in card making.
If you're interested in the current SSS Flickr challenge, I would like to recommend you to visit here :
SSSflickrchallenge#72
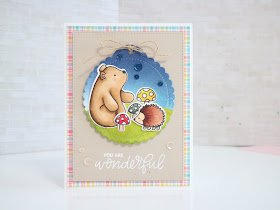
So, here are my cards.
The theme for the new challenge #72 is "Summer Fun" .
You can express anything that you like about summer in your craft work.

The Simon Says Stamp Exclusive Products that I used are 'Warm Christmas whishes' , 'One with Nature', 'Summer Happiness sets' , 'Postage Stamp Edge Frame Craft Dies' from Simon Says Stamp.
The first one is a big frame shaker card.
As my IG friends already know, I'm a big fan of shaker cards.
I love the moment when I put lots of pretty sequins into a shaker.

I first stamped a palm tree from "Warm Christmas Wishes" on a A2 size white cardstock and masked it with masking paper, then blended the background with Timholtz distress inks. I used salty ocean and tumbled glass for the sky, wild honey and scattered straw for sand.

For the big frame of shaker card, I used MME's big frame die , sequins are products of The Tons.
Soft pink colored background paper is from lawn fawn's watercolor wishes paper pack

After finishing the shaker cards, I suddenly wanted to make aka CAS card.
So I stamped the images of "Warm Christmas Wishes" again on a white card stock with masking technique when needed, and colored with copic markers.
I stamped some sentiments from "One with Nature".
Then I die-cut the panel with MFT's Wonky Stitched Rectangle and foam mounted it onto a Natural card stock .
Finally I put some clear sparkling sequins from Pretty Pink Posh.
Thanks for reading this post.
I hope you enjoyed my cards and got a little bit of inspirations from them.
And I hope to see you joining this gorgeous SSS Flickr challenge !
If you're an Instagram user, don't forget to add a tag #sssflickrchallenge to your work :)
You can express anything that you like about summer in your craft work.

The Simon Says Stamp Exclusive Products that I used are 'Warm Christmas whishes' , 'One with Nature', 'Summer Happiness sets' , 'Postage Stamp Edge Frame Craft Dies' from Simon Says Stamp.
The first one is a big frame shaker card.
As my IG friends already know, I'm a big fan of shaker cards.
I love the moment when I put lots of pretty sequins into a shaker.

I first stamped a palm tree from "Warm Christmas Wishes" on a A2 size white cardstock and masked it with masking paper, then blended the background with Timholtz distress inks. I used salty ocean and tumbled glass for the sky, wild honey and scattered straw for sand.

For the big frame of shaker card, I used MME's big frame die , sequins are products of The Tons.
In the second card, I decided to make a smaller shaker.
Background and Santa coloring is the same as the first one.
For the shaker , I made a square window using a postage stamp edge frames craft die
"Beach" die-cut was made using summer greetings wafer die and colored with distress ink 'wild honey' .Soft pink colored background paper is from lawn fawn's watercolor wishes paper pack
Now, two shaker cards are done.

After finishing the shaker cards, I suddenly wanted to make aka CAS card.
So I stamped the images of "Warm Christmas Wishes" again on a white card stock with masking technique when needed, and colored with copic markers.
I stamped some sentiments from "One with Nature".
Then I die-cut the panel with MFT's Wonky Stitched Rectangle and foam mounted it onto a Natural card stock .
Finally I put some clear sparkling sequins from Pretty Pink Posh.
Thanks for reading this post.
I hope you enjoyed my cards and got a little bit of inspirations from them.
And I hope to see you joining this gorgeous SSS Flickr challenge !
If you're an Instagram user, don't forget to add a tag #sssflickrchallenge to your work :)
Have a Nice Weekend !
< Supplies >
< Supplies >


